
More project photos (2)
The problem
An electronic voting machine with fingerprint verification answers a practical question: how do you make sure only registered voters vote, and each voter votes exactly once, without paper ballots or long queues? This Arduino-based project enrolls every voter's fingerprint into an R307 optical sensor module during an admin setup phase, and at voting time the live fingerprint must match a stored template before any candidate button becomes active. Because the firmware unlocks voting only after a successful match — and then marks that fingerprint as already voted — the build physically enforces one vote per voter, so proxy voting is impossible at the machine itself. A 16×2 LCD guides the voter step by step and shows the running tally, while a buzzer confirms each recorded vote. Nothing about this prototype is certified for real elections, but as a lab build it makes the core mechanism of biometric voting tangible: capture, template matching, and access control in one honest hardware loop.
How it works
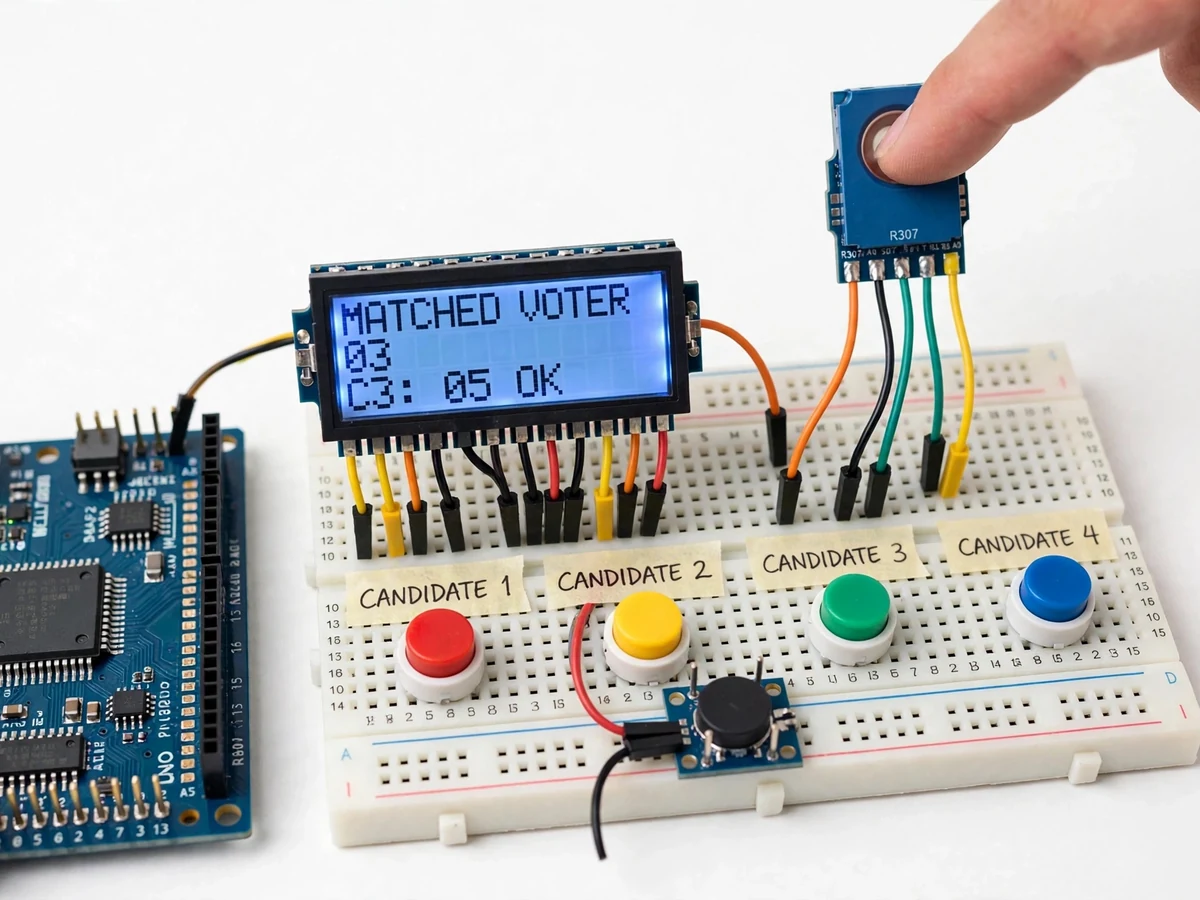
End to end, the voting machine works in two phases: enrollment and voting. During enrollment the admin switches to setup mode and each voter presses one finger on the R307 sensor twice, from slightly different angles — the module photographs the ridge pattern and fuses the two scans into one minutiae template stored in its flash, linked to a voter ID. The sensor stores minutiae templates, not fingerprint images, so nothing that looks like a fingerprint leaves the module. In voting mode the machine idles at a 'place finger' prompt; the voter presses a finger, the sensor matches it against stored templates and returns the voter ID to the Arduino in under one second (typical, datasheet value). The Arduino checks a voted-flag for that ID: set means the LCD shows already-voted and buttons stay dead; clear means the four candidate buttons unlock for one press that increments the counter, sounds the buzzer, sets the flag and restores the LCD to idle.
- Admin enters enroll mode; each voter presses the same finger on the R307 sensor twice from slightly different angles to build one reliable minutiae template — two-angle enrollment was the single most effective fix for match failures during the build.
- Templates are stored in the sensor's own flash — up to 1,000 (datasheet value) — each linked to a voter ID, and the Arduino keeps one voted-flag per ID in EEPROM.
- In voting mode the LCD prompts PLACE FINGER; the voter presses a finger and the sensor matches it against the stored templates, returning the voter ID to the Arduino in under 1 s (typical, datasheet value).
- The Arduino checks the voted-flag: an already-voted ID gets ALREADY VOTED on the LCD and every button press is ignored.
- For a fresh voter the 4 candidate buttons unlock; one press increments that candidate's counter, sounds the buzzer, sets the voted-flag, and refreshes the tally line on the LCD.
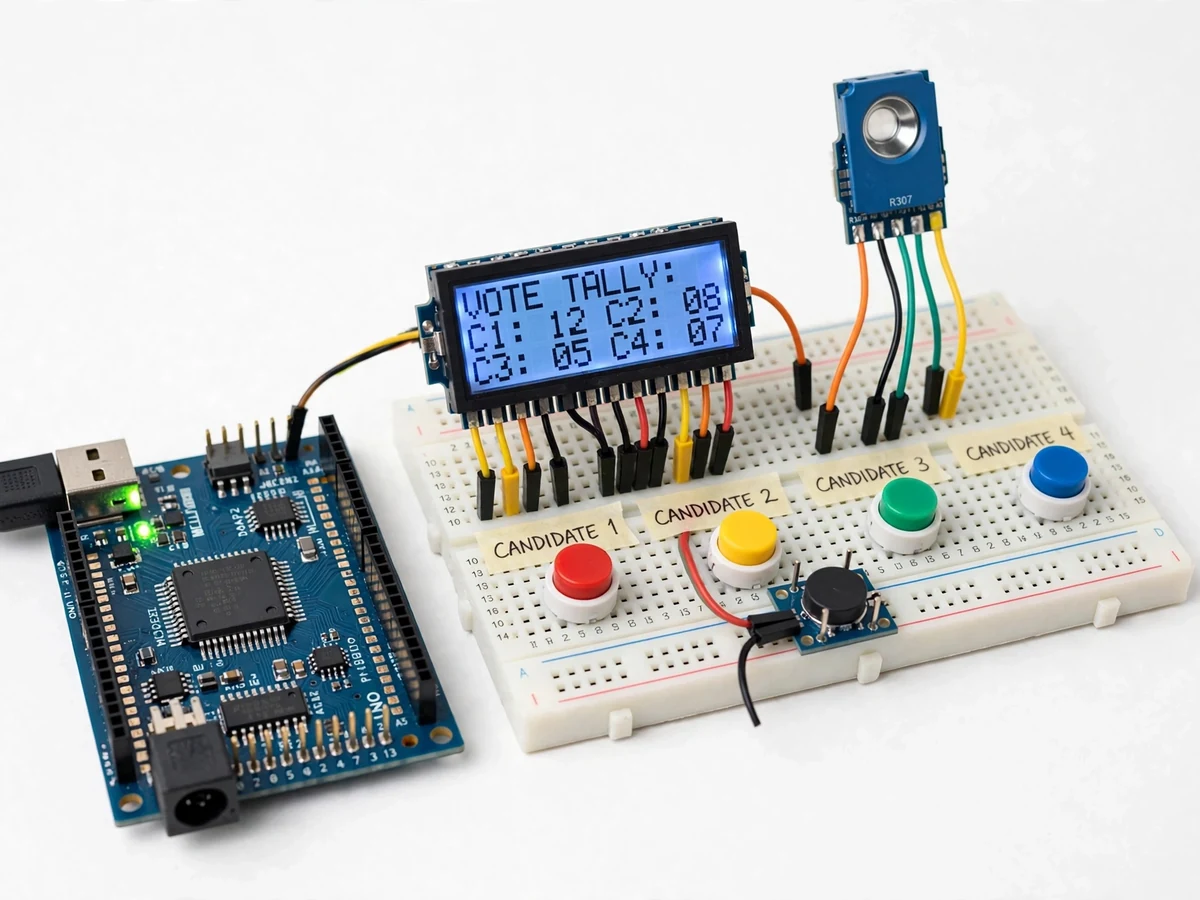
- The admin reviews the full per-candidate tally on the 16×2 LCD at any time; a hidden long-press resets all counters after verification.
Tech stack:
- Arduino Uno (ATmega328P)
- R307 optical fingerprint module
- 16×2 LCD display (I2C backpack)
- Adafruit Fingerprint Sensor library
- Arduino IDE (C/C++ firmware)
- Push buttons + 10 kΩ pull-down resistors
- 5 V buzzer module
- Breadboard + jumper wires
| Parameter | Value |
|---|---|
| Microcontroller | Arduino Uno (ATmega328P @ 16 MHz) |
| Fingerprint module | R307 optical sensor, UART interface |
| Template capacity | Up to 1,000 templates (datasheet value) |
| Match time | Under 1 s (typical, datasheet value) |
| False acceptance rate | Under 0.001% (datasheet value) |
| Candidate inputs | 4 push buttons (design choice) |
| Display | 16 × 2 character LCD |
| Vote record | 1 byte voted-flag per voter ID in EEPROM |
| Enroll scans per voter | 2 (design choice) |
| Supply | 5 V DC via USB or regulated adapter |
Project features
The voting machine's most important capabilities are biometric voter authentication, firmware-enforced single voting, on-device vote tallying, and a guided voting interface. Biometric voter authentication is handled by the R307 optical fingerprint module, which stores enrolled fingerprint templates in its own flash memory and matches a live finger against them in under one second (typical, datasheet value) — so an unregistered voter never reaches the voting stage. Firmware-enforced single voting is the heart of the project: the Arduino checks each matched fingerprint against a voted-flag in EEPROM, rejects repeat attempts with an LCD message, and accepts exactly one button press per voter. On-device vote tallying keeps per-candidate counters that the admin reviews on the 16×2 LCD with no computer attached. Finally, the guided voting interface walks each voter through the whole process — place finger, wait for the match, press a candidate button, hear the confirmation — so the demo is self-explanatory in front of examiners.
- [Fingerprint enrollment mode] Admin setup mode stores each voter's fingerprint as a minutiae template in the R307's flash memory, linked to a voter ID — up to 1,000 templates (datasheet value).
- [Sub-second fingerprint matching] A live finger is matched against the stored templates in under 1 s (typical, datasheet value), with MATCHED or NOT REGISTERED shown on the LCD.
- [Firmware-enforced single vote] Each matched voter ID carries a voted-flag in EEPROM; repeat attempts are rejected with ALREADY VOTED and the buttons stay locked.
- [Four candidate push buttons] 4 color-coded buttons (design choice), each with a pull-down resistor wired to its own Arduino input pin.
- [Live tally on the LCD] Per-candidate counters update after every vote, and the admin can review the full tally on the 16×2 display without a computer.
- [Buzzer confirmation tones] A short beep confirms every recorded vote; a longer tone signals invalid or repeat attempts.
- [Admin tally reset] A hidden long-press button clears all counters after the admin verifies the tally, readying the machine for the next demo round.
What is included
- Assembled and tested EVM prototype (Arduino Uno, R307 module, 16×2 LCD, 4 candidate buttons, buzzer — wired on breadboard)
- Arduino firmware source (.ino): enroll mode, voting mode, tally review, admin reset
- Circuit diagram and wiring reference sheet
- Project report PDF (background, components, methodology, firmware flow, results)
- PPT presentation for the final review
- Viva Q&A preparation document (fingerprint matching, EEPROM flags, state machine, limitations)
Limitations & prerequisites
- Academic prototype for demonstrating biometric voting concepts — not certified for real elections; no ECI compliance and no tamper-proofing.
- Fingerprint sensors can reject wet, dirty or worn fingerprints, so some voters may fail to match.
- Voter IDs, templates and voted-flags live on the bench hardware — no voter-roll server, network sync or audit log.
- The EEPROM voted-flag table is sized for a demo-class roll (design choice), not a real electorate.
- The under-0.001% false-acceptance figure is a datasheet value under lab conditions, not a guarantee in this build.
- No anti-spoofing: like most low-cost optical modules, it cannot reliably detect fake fingerprint replicas.
Frequently Asked Questions
How does the fingerprint matching actually work?
The R307 optical sensor photographs the ridge pattern of your finger and converts it into a minutiae template — a compact map of ridge endings and bifurcations — which it compares against templates stored in its own flash memory. It stores templates, not fingerprint images, so no actual fingerprint picture exists anywhere in the machine. A match returns the stored voter ID to the Arduino in under one second (typical, datasheet value); the module holds up to 1,000 templates (datasheet value), each linked to a voter ID assigned during enrollment.
How does the machine prevent double voting?
One-vote-per-fingerprint is enforced entirely in firmware. The Arduino keeps a voted-flag for every enrolled voter ID in its EEPROM; when a matched finger arrives, the firmware checks the flag before unlocking the buttons, and any repeat attempt from the same fingerprint is rejected with an ALREADY VOTED message on the LCD. The flags survive power cycles because EEPROM is non-volatile, so unplugging the machine cannot reset anyone's vote.
Can this voting machine be used in real elections?
No — this is an academic prototype for demonstrating biometric voting concepts, not a certified election device. It has no tamper-proofing, no voter-roll server, no audit log and no ECI compliance, so it must never be presented as usable for real elections. Real EVMs are built under strict certification with VVPAT, sealed hardware and supervised procedures — a college bench prototype demonstrates the mechanism, not the trust model.
What if a fingerprint is not recognized during voting?
The LCD shows NOT REGISTERED and the buttons stay locked; nothing is recorded. The most common cause is a rushed enrollment — the fix used during the build was to enroll each voter's finger twice from slightly different angles during admin setup, which dramatically improved match reliability in the demo. Wet, dirty or worn fingerprints can also fail; the voter should clean and dry the finger and try again, and the admin can re-enroll the voter if needed.
How many voters and candidates does the machine support?
The R307 module stores up to 1,000 fingerprint templates (datasheet value), each linked to one voter ID, and the build uses 4 candidate push buttons (design choice) — enough for a class or department-level demo election. The Arduino's EEPROM voted-flag table is sized for the same demo scale. Scaling beyond that would need external memory or a companion database, which is noted as future scope.
Is this project suitable for a final-year project?
Yes — for Electronics, Electrical and IoT programs. It combines embedded C firmware, sensor interfacing, a real state machine (enroll, verify, vote, tally), and biometric concepts into one working prototype with a strong demo and clear viva questions, which makes the viva straightforward to defend. The build is complex enough to show real engineering but compact enough to finish and explain confidently within a semester.
Components & software requirements
- Arduino Uno (ATmega328P)
- R307 optical fingerprint module
- 16×2 LCD display (I2C backpack)
- Adafruit Fingerprint Sensor library
- Arduino IDE (C/C++ firmware)
- Push buttons + 10 kΩ pull-down resistors
- 5 V buzzer module
- Breadboard + jumper wires
Delivery information
Built-to-order project. Delivery timeline is shared after order confirmation based on current queue.
Support terms
Complete documentation, setup guide, and viva preparation included. Support for setup and explanation provided.
Download free synopsis (PDF)
Enter your name and WhatsApp number — the synopsis PDF downloads immediately. We may send occasional project updates on WhatsApp; no spam.