
More project photos (2)
The problem
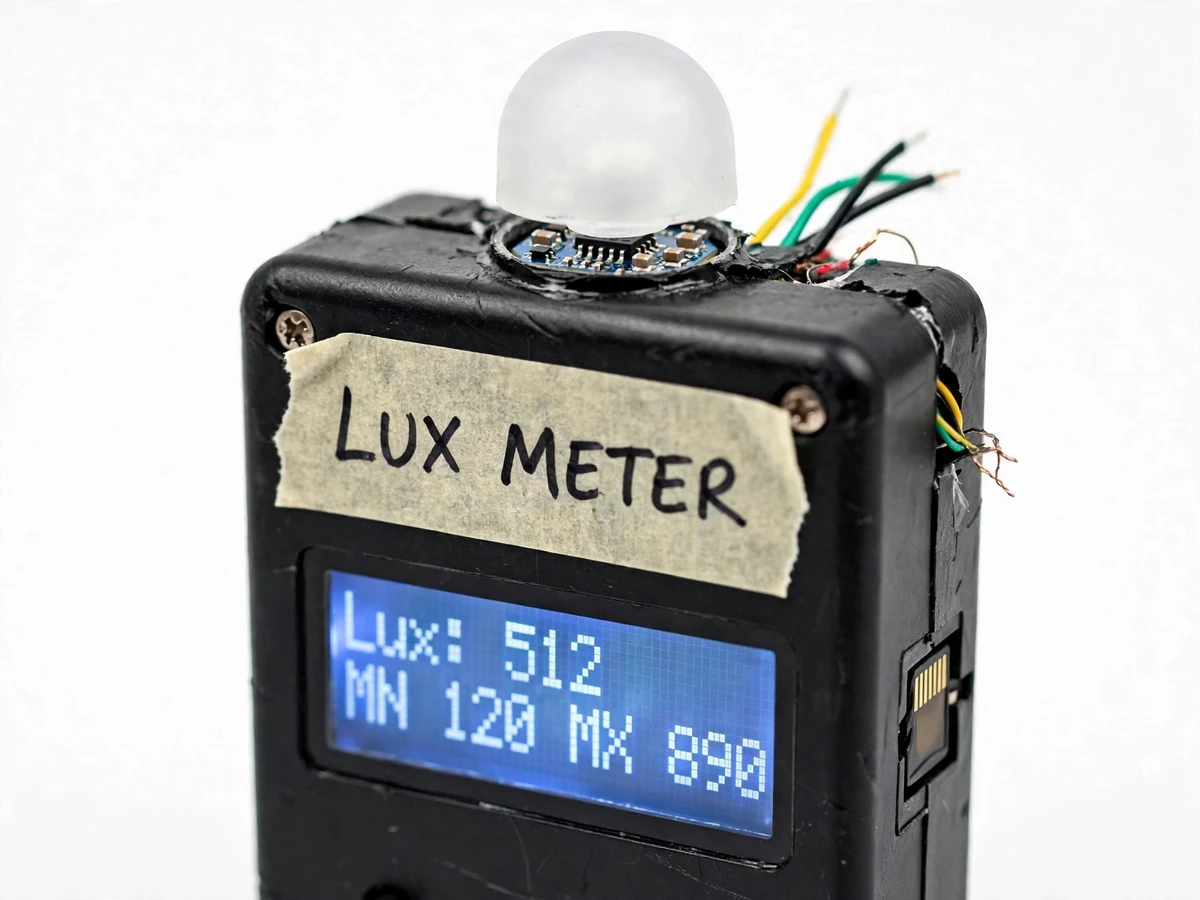
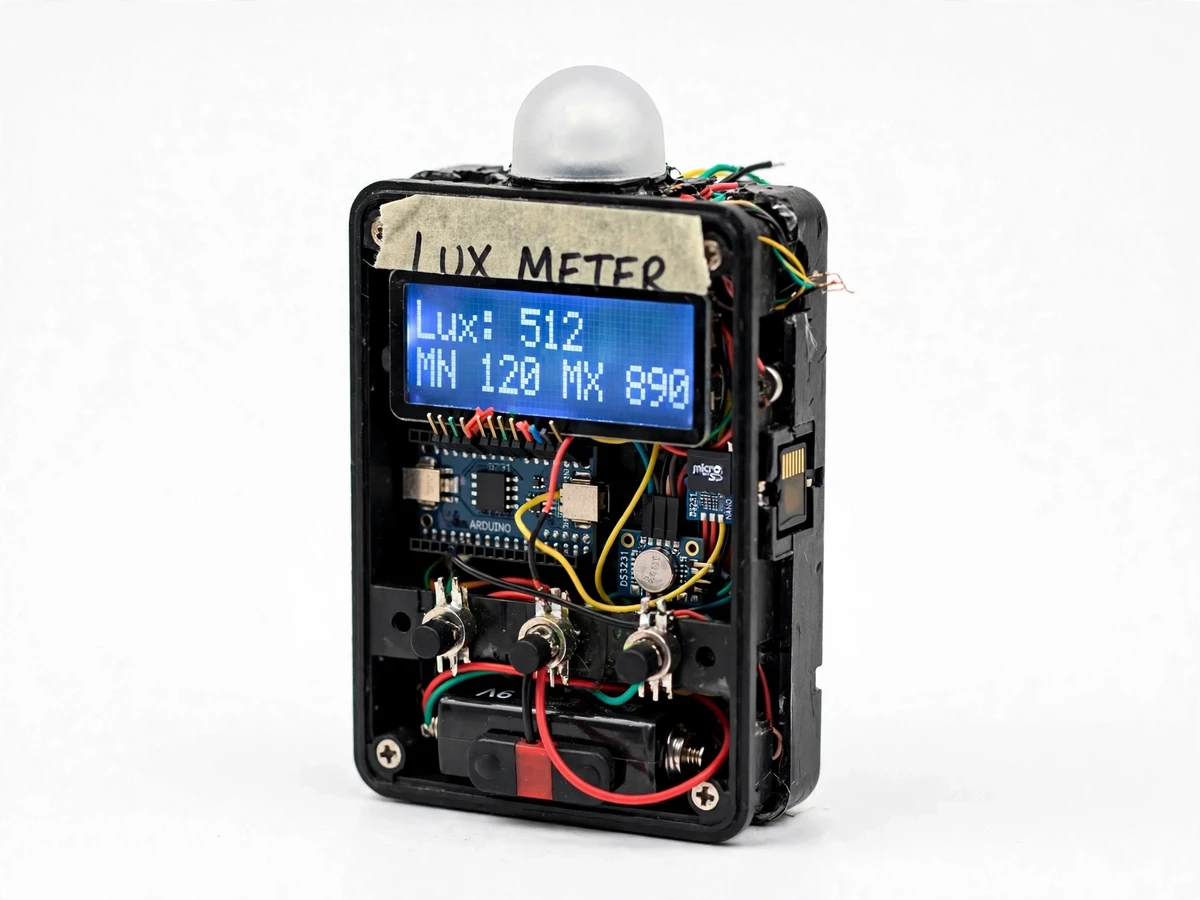
Lighting audits are a standard part of energy management and electrical maintenance: classrooms, workshops, offices and hospital wards all have prescribed illumination levels, and verifying them means walking the space with a lux meter and noting readings point by point. Cheap commercial meters show only a live number, so the audit becomes a clipboard exercise — read, write, move, repeat — and the data never lands in a form that can be analyzed. Logging meters exist but cost several times more, and neither option is something a student can open up, understand and explain. This project closes that gap with a hand-held digital lux meter built around the BH1750 digital light sensor: it displays live lux on a 16x2 LCD, tracks session minimum and maximum, and writes every reading with a timestamp to a CSV file on a microSD card, ready for analysis in a spreadsheet. The sensing, the display, the logging and the firmware are all student-scale engineering, which makes it both a working audit instrument and a genuinely explainable project.
Digital light sensor in continuous high-resolution mode; the Nano converts the 16-bit result to lux by dividing by 1.2 per the datasheet.
Follow the working sequence
How it works
- The BH1750 (I2C address 0x23) is started in continuous high-resolution mode — 120 ms typical measurement time and 1 lux resolution per the datasheet.
- The Arduino Nano reads the 16-bit result over I2C and converts it to lux by dividing by 1.2, the conversion factor the BH1750 datasheet defines for this mode.
- Every 500 ms the firmware refreshes the 16x2 LCD: line one shows the live lux value, line two the session minimum and maximum.
- HOLD freezes the display without stopping sensing or logging; RST clears the stored min/max and restarts the session statistics.
- LOG toggles logging: when active, the Nano reads the DS3231 timestamp over I2C and appends
date,time,lux,min,maxto a CSV file on the microSD card every 10 seconds (configurable in firmware). - The SD file opens directly in a spreadsheet, so an audit route becomes a plottable dataset instead of clipboard notes.
Tech stack:
- Arduino Nano (ATmega328P) with Arduino C/C++ firmware
- BH1750 digital light sensor (I2C)
- 16x2 character LCD (HD44780 controller)
- DS3231 real-time clock (I2C, battery-backed)
- microSD card module (SPI, FAT32)
- CSV data logging, opens directly in Excel
- 9V battery / USB 5V power
- Hand-held ABS enclosure with frosted sensor dome
| Parameter | Value |
|---|---|
| Measurement range | 1–65,535 lux (datasheet value, BH1750) |
| Resolution | 1 lux (datasheet value, high-resolution mode) |
| Typical accuracy | ±20% of reading (datasheet value) |
| Measurement time | 120 ms typical (datasheet value) |
| Spectral response peak | ~560 nm, near the human-eye photopic curve (datasheet value) |
| Display | 16×2 character LCD, blue backlight |
| Logging format | CSV: date, time, lux, min, max — on microSD (FAT32, up to 32 GB) |
| Logging interval | 10 s default, configurable in firmware |
| RTC accuracy | ±2 ppm from 0 °C to +40 °C (datasheet value, DS3231) |
| Power | 9 V battery or USB 5 V; ~40 mA typical draw (Expected) |
| Battery life | ~12 hours continuous logging on 9 V alkaline (Expected) |
| Controls | 3 tactile buttons: HOLD, min/max RST, LOG start/stop |
Project features
- [Digital lux sensing] A BH1750 ambient-light sensor measures illuminance directly in lux over its 1–65,535 lux datasheet range — no ADC conversion math or calibration curves needed.
- [Live LCD readout with min/max] The 16x2 display shows the current reading plus the session minimum and maximum, updating continuously as you walk the audit route.
- [Hold function] One button press freezes the displayed reading, so you can note or photograph a value without rushing while sensing continues in the background.
- [Timestamped CSV logging] A DS3231 real-time clock and microSD module append date, time, lux, min and max to a CSV file at the configured interval.
- [Logging start/stop control] A dedicated button begins and ends each logging session, so every audit is stored as its own cleanly separated file.
- [Battery or USB power] Runs from a 9V battery for field audits or USB 5V on the bench — no mains supply needed anywhere in the workflow.
- [Sensor diffuser dome] A frosted dome over the BH1750 evens out directional light for more repeatable readings across angles; an honest mechanical detail, not a certified cosine correction.
What is included
- Working hand-held lux meter prototype with sensor dome and enclosure
- Arduino firmware source (.ino) with configurable logging interval
- Wiring diagram and component list with sourcing notes
- Lighting-audit procedure manual (route walkthrough, reading method, CSV analysis)
- Project report PDF (photometry basics, sensor theory, design, methodology)
- PPT presentation for final review
- Viva Q&A preparation document
Limitations & prerequisites
- Typical accuracy is ±20% per the BH1750 datasheet — an audit instrument, not a certified photometer; every reading carries that tolerance.
- The sensor's spectral response approximates the human-eye curve but is not identical; sources with unusual spectra (some LEDs, discharge lamps) can read differently than a reference meter.
- For defensible audit numbers the unit should be calibrated against a reference lux meter; the manual includes the comparison procedure and the firmware accepts an offset constant.
- Logging is limited by the microSD card (FAT32, up to 32 GB); there is no wireless or cloud sync — the card must be read on a computer.
- Battery life depends on backlight use and logging interval; ~12 hours is an expected figure at the default 10 s interval, not a measured guarantee.
- The enclosure is not weatherproof — indoor audits only; the unit must not get wet.
- I2C wiring keeps the sensor close to the controller, so the dome sits on the unit itself rather than on a remote probe.
Frequently Asked Questions
How accurate is this lux meter?
The BH1750 datasheet specifies ±20% typical accuracy, and the report states that number honestly rather than claiming lab-grade precision. It is more than adequate for comparative lighting audits — finding under-lit areas, checking uniformity, before-and-after relamping studies — and the manual includes a calibration procedure against a reference meter for buyers who need tighter numbers.
What does the logged data look like?
Each row is a plain CSV line: date, time, lux, session min, session max. The microSD card goes straight into a laptop and the file opens in Excel or Google Sheets — no conversion software, no proprietary format. A lighting audit route becomes a plottable dataset: lux over time across rooms, ready for charts in the report.
Can the logging interval be changed?
Yes — the interval is a single constant at the top of the firmware, set to 10 seconds by default. Recompile and upload through the Arduino IDE and the meter logs at the new rate. Faster logging captures flicker-prone sources better; slower logging stretches battery life and keeps files small.
Why a BH1750 instead of an LDR?
An LDR gives a resistance that varies non-linearly with light and needs per-unit calibration curves; the BH1750 is a digital sensor whose output converts directly to lux using the datasheet formula. That keeps the firmware simple, makes readings comparable between builds, and lets the report cite real datasheet specifications instead of hand-waving.
Does it work for outdoor sunlight?
The sensor's 1–65,535 lux range covers full daylight, so outdoor readings are possible. But the enclosure is not weatherproof and the LCD washes out in bright sun, so the design target is indoor lighting audits — classrooms, labs, workshops, offices.
Is this project suitable for a final-year project?
Yes — for Electrical and Electronics programs. It combines digital sensor interfacing, I2C and SPI communication, RTC integration, SD-card file handling and embedded C firmware around a genuine lighting-audit application. The report and viva kit cover photometry basics, the BH1750 operating principle and the audit methodology, so the viva has real content to discuss.
Components & software requirements
- Arduino Nano (ATmega328P) with Arduino C/C++ firmware
- BH1750 digital light sensor (I2C)
- 16x2 character LCD (HD44780 controller)
- DS3231 real-time clock (I2C, battery-backed)
- microSD card module (SPI, FAT32)
- CSV data logging, opens directly in Excel
- 9V battery / USB 5V power
- Hand-held ABS enclosure with frosted sensor dome
Delivery information
Built-to-order project. Delivery timeline is shared after order confirmation based on current queue.
Support terms
Complete documentation, setup guide, and viva preparation included. Support for setup and explanation provided.
Download free synopsis (PDF)
Enter your name and email — the synopsis PDF downloads immediately. We may send occasional project updates; no spam, unsubscribe anytime.