
More project photos (2)
The problem
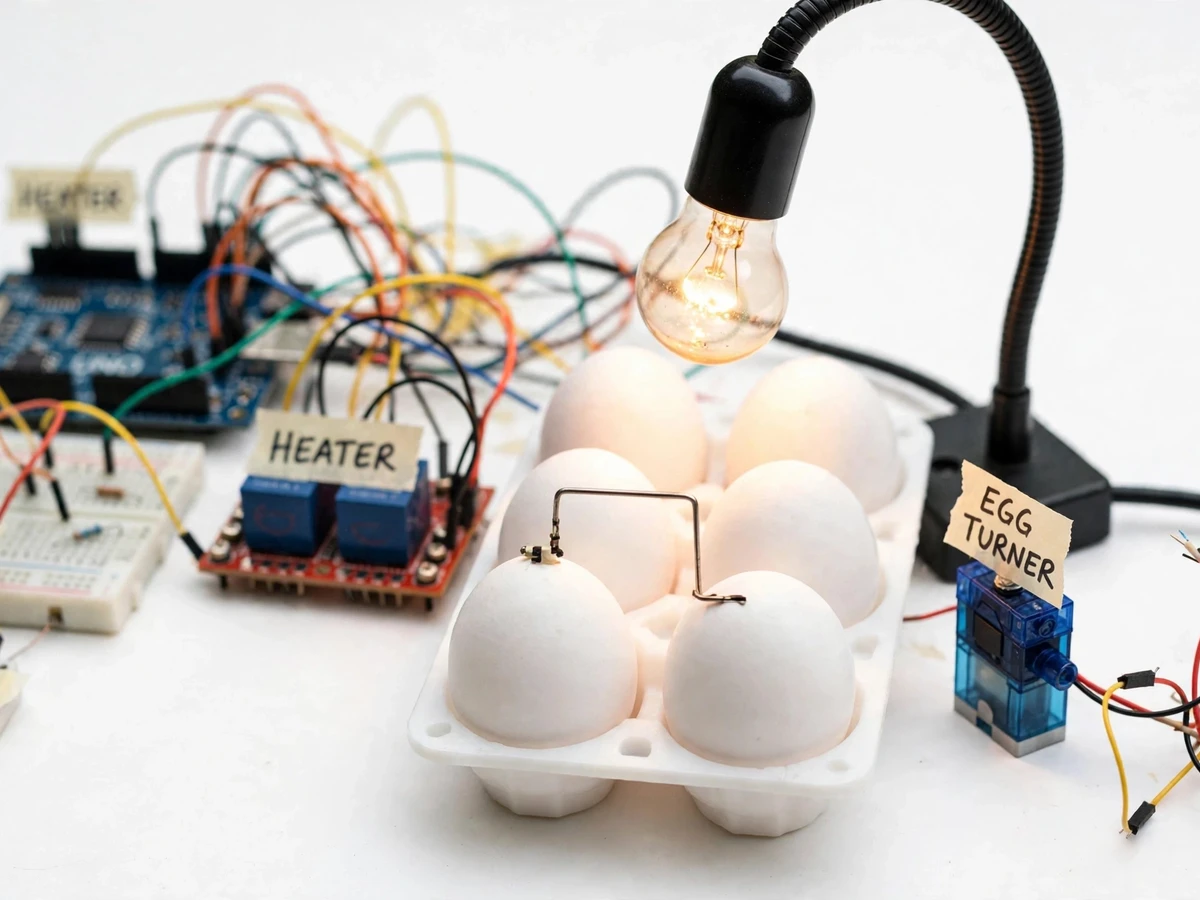
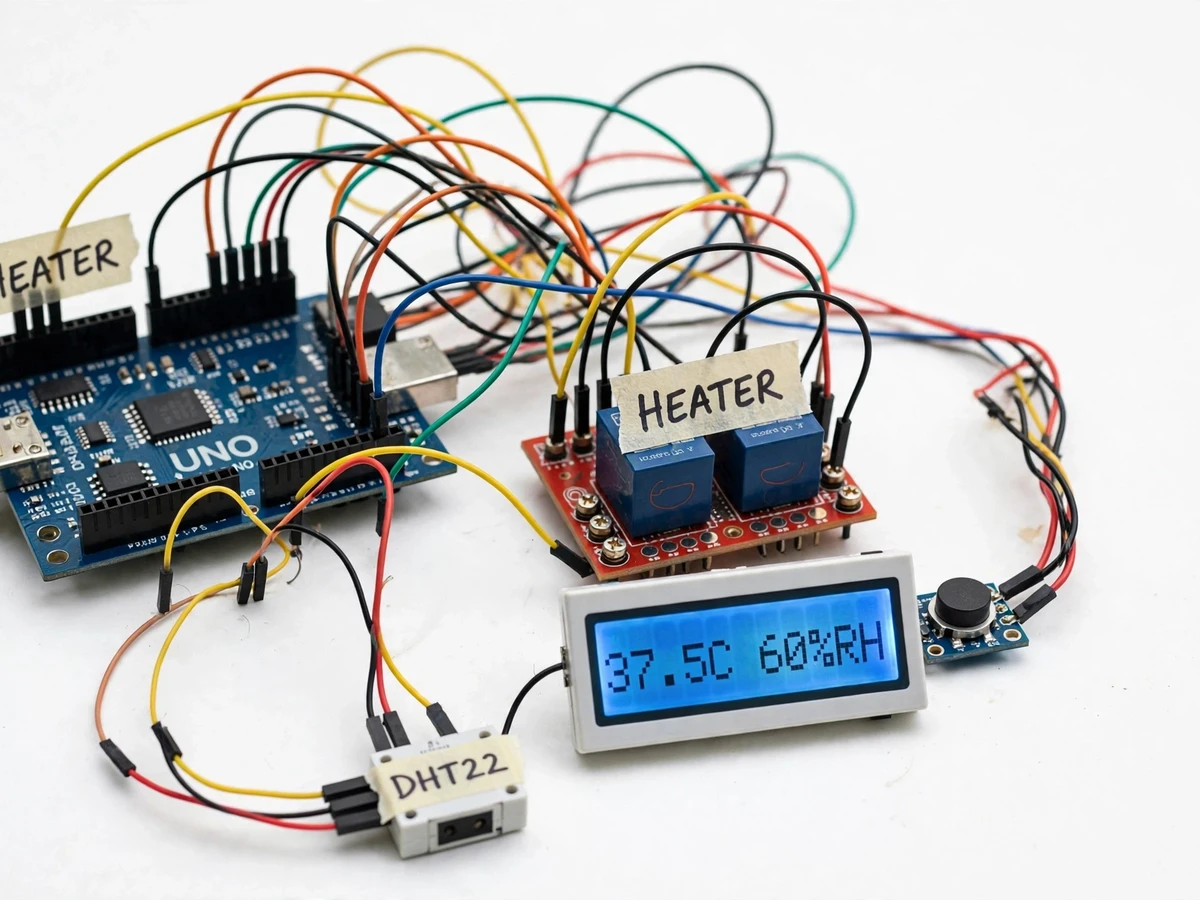
Chicken eggs hatch only when held near 37.5°C at roughly 55–65% relative humidity for three weeks, turned several times a day so the developing embryo does not stick to the shell membrane. Manual incubators rely on a keeper checking a thermometer a few times a day, switching a bulb or fan by hand, and turning each egg — a routine that drifts whenever nights turn cold or a turning slot is missed, and one cold night can ruin a batch. This project replaces the manual routine with an Arduino-based controller. A DHT22 sensor feeds temperature and humidity to the Arduino, which drives a relay for the heater bulb, a second relay for the humidity fan over a water tray, and a timer-driven servo or geared DC motor that tilts the egg tray at fixed intervals, stopping three days before hatch. A 16x2 LCD reports live readings and the remaining days to hatch, while a buzzer alarms on out-of-range conditions. It is a complete, self-contained embedded build — sensing, closed-loop control, timed actuation and alarm handling in one working prototype.
Samples chamber temperature and humidity every 2 seconds and reports both to the Arduino.
Follow the working sequence
How it works
- The DHT22 sensor samples chamber temperature and humidity every 2 seconds (datasheet minimum interval) and reports both values to the Arduino Uno.
- The Arduino compares temperature against the 37.5°C design-target setpoint and switches the heater-bulb relay on or off with hysteresis so the lamp does not flicker at the threshold.
- If humidity drops below the configured lower limit of the 55–65% design-target band, the Arduino energizes the second relay to run the humidity fan over the water tray until readings recover.
- A millis-based timer counts down the turning interval; when it elapses, the servo or geared DC motor drives the tray tilt mechanism through its turning stroke and the timer restarts.
- During the final 3 days before the configured hatch day, the turner is automatically disabled (lockdown) while temperature and humidity control continue.
- After every sensor cycle the LCD refreshes with temperature, humidity, heater state, turner state and days remaining; any reading outside the configured band triggers the buzzer alarm.
Tech stack:
- Arduino Uno (ATmega328P)
- DHT22 temperature/humidity sensor
- 2-channel relay module (5V)
- 16x2 LCD display (HD44780)
- Servo / geared DC motor (egg-turner actuator)
- Arduino IDE (C/C++ firmware)
- Incandescent bulb heater
- 5V / 230V AC power supply
| Parameter | Value |
|---|---|
| Controller | Arduino Uno (ATmega328P) |
| Temperature sensor | DHT22; ±0.5°C (datasheet value) |
| Humidity sensor | DHT22; ±2% RH (datasheet value) |
| Temperature setpoint | 37.5°C (design target, configurable) |
| Humidity band | 55–65% RH (design target, configurable) |
| Egg-turning interval | Every 2–4 hours (design target, configurable) |
| Lockdown before hatch | Final 3 days, turning disabled (configurable) |
| Typical incubation period | Approximately 21 days for chicken eggs (typical) |
| Chamber capacity | Approximately 6–12 eggs, tray-dependent (approximate) |
| Sensor sampling | Every 2 seconds (datasheet minimum) |
| Display | 16x2 LCD: temperature, humidity, heater/turner state, hatch countdown |
| Alarm | Active buzzer on out-of-range readings |
| Power | 5V DC for logic; 230V AC switched by relay for heater bulb |
| Operating mode | Fully offline; no internet or app required |
Project features
- [Closed-loop temperature control] The DHT22 reports chamber temperature and the Arduino switches a relay-driven incandescent heater bulb to hold the 37.5°C design-target setpoint with hysteresis, avoiding rapid on/off cycling.
- [Humidity regulation] When humidity falls below the configured lower band, the Arduino runs a small fan over a water tray to push moisture into the chamber air, lifting relative humidity back into the 55–65% design-target range.
- [Timed automatic egg turning] A servo or geared DC motor drives the tray tilt mechanism at configurable intervals (design target: every 2–4 hours), reproducing the turning schedule of natural incubation.
- [Lockdown mode before hatch] Turning stops automatically for the final 3 days before hatch day (configurable), so the eggs rest undisturbed during the lockdown phase.
- [Hatch countdown on LCD] The 16x2 LCD shows live temperature, humidity, heater and turner state plus a countdown of remaining days to hatch.
- [Out-of-range buzzer alarms] If temperature or humidity leaves the configured safe band, a buzzer sounds so the problem is noticed even when nobody is watching the display.
- [Adjustable setpoints and schedules] The temperature setpoint, humidity band and turning interval are configurable through push buttons or in the firmware, so the controller can be adapted to quail or duck eggs.
What is included
- Working built-to-order hardware prototype (controller unit, sensors, relays, turner mechanism, heater assembly)
- Complete Arduino firmware source code with commented logic
- Circuit diagram and wiring documentation
- Component list with sourcing notes
- Step-by-step setup and calibration guide
- Project report PDF (background, working, methodology, results)
- PPT presentation for final review
- Viva Q&A preparation document
- Project abstract PDF
Limitations & prerequisites
- No hatch rate is promised or measured — hatch success depends on egg fertility, handling, calibration and stable power, none of which the controller can guarantee.
- The DHT22 is accurate to ±0.5°C and ±2% RH per its datasheet; a reference thermometer check during calibration is recommended before trusting the setpoint.
- Capacity is approximately 6–12 eggs depending on the tray; this is a bench-top demonstrator, not a hatchery-scale machine.
- Humidity control is one-directional — the fan over the water tray adds moisture but the system cannot dehumidify; in already-humid climates the upper band may not be reachable.
- There is no built-in battery backup; a power cut stops heating and turning until supply returns.
- The heater switches 230V AC through a relay, so the high-voltage side needs proper insulation and adult supervision during assembly.
Frequently Asked Questions
Is this project suitable for a final-year project?
Yes. It suits Electronics, E&TC and Electrical programs because it demonstrates sensor interfacing, closed-loop temperature control, relay-based power switching, timed actuation, LCD interfacing and alarm handling in one complete embedded build. Every design choice — the sensor, the hysteresis, the turning schedule — is documented and defensible in a viva discussion.
Which controller and sensors does it use?
An Arduino Uno (ATmega328P) reads a DHT22 digital temperature-humidity sensor every 2 seconds. The heater bulb and humidity fan are switched through a 5V 2-channel relay module, the egg turner is driven by a servo or geared DC motor, and status shows on a 16x2 LCD.
Can I change the temperature setpoint and turning schedule?
Yes. The temperature setpoint, humidity band, turning interval and hatch day are all configurable in the firmware, and on-device push buttons allow adjustment without reprogramming. That means the controller can be retuned for different egg types — for example, adapting the 37.5°C chicken schedule to the different temperature and timing needs of quail or duck eggs.
Will the eggs definitely hatch?
No guarantee is made, and none is measured. The controller holds temperature, humidity and turning precisely, but hatching also needs fertile eggs, correct sensor calibration, clean eggs and uninterrupted power for three full weeks. The page and the report deliberately carry no invented hatch-rate claim — that honesty is exactly what examiners expect from a serious build.
Does it need internet or a phone app?
No. Everything runs locally on the Arduino and the 16x2 LCD — the readings, the control decisions, the turning schedule and the buzzer alarms all work fully offline. Keeping it offline makes the build simpler and cheaper, and it means the prototype can be demonstrated anywhere without worrying about Wi-Fi or hotspots.
What power supply does it need?
A 5V DC adapter powers the Arduino, the sensors, the LCD and the turner motor, while the heater bulb runs on 230V AC switched through the relay module. The base build has no battery backup, so a power cut pauses heating and turning until supply returns.
Components & software requirements
- Arduino Uno (ATmega328P)
- DHT22 temperature/humidity sensor
- 2-channel relay module (5V)
- 16x2 LCD display (HD44780)
- Servo / geared DC motor (egg-turner actuator)
- Arduino IDE (C/C++ firmware)
- Incandescent bulb heater
- 5V / 230V AC power supply
Delivery information
Built-to-order project. Delivery timeline is shared after order confirmation based on current queue.
Support terms
Complete documentation, setup guide, and viva preparation included. Support for setup and explanation provided.
Download free synopsis (PDF)
Enter your name and email — the synopsis PDF downloads immediately. We may send occasional project updates; no spam, unsubscribe anytime.