
More project photos (2)
The problem
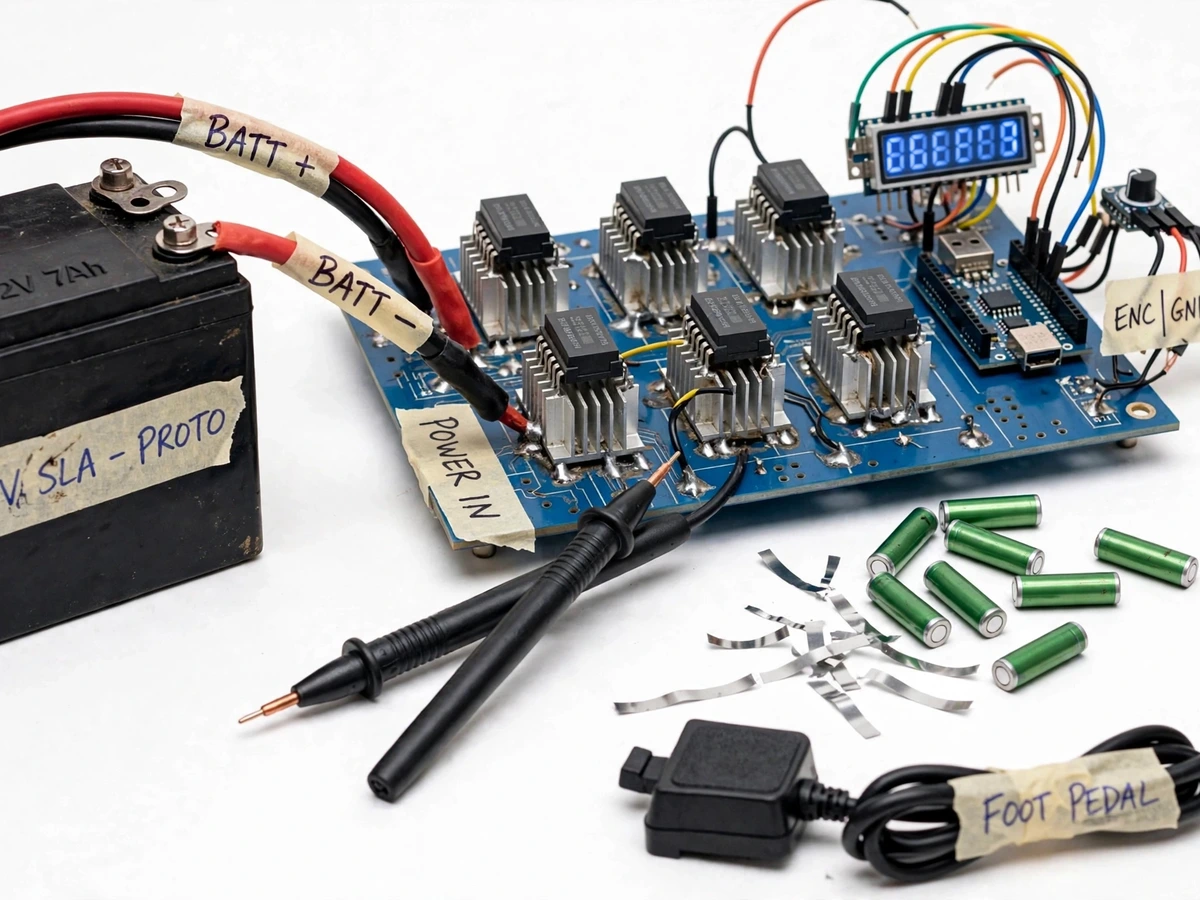
Students building lithium battery packs — for e-bikes, solar-storage demos and RC models — face a practical problem: joining 18650 cells with a soldering iron overheats and damages the cell, while commercial spot welders cost thousands of rupees and teach nothing about how they work. The result is either unsafe soldered packs or a black-box purchase. This project builds the welder itself: a 12 V battery-powered spot welder that switches the weld current through parallel power MOSFETs, with an Arduino Nano setting the pulse from 1 to 100 ms and an optional dual-pulse mode that fires a short pre-pulse to break through surface oxide. Two copper probe pens deliver the pulse to 0.1–0.15 mm nickel strip on the cell terminals, triggered by a foot pedal or automatically on probe contact. Because the builder selects the MOSFETs, wires the high-current path and calibrates timing with test welds on scrap strip, the project teaches genuine power electronics — not just how to operate a tool. Unlike the mains-powered microwave-transformer welder also listed here, this build is low-voltage, portable and timer-precise.
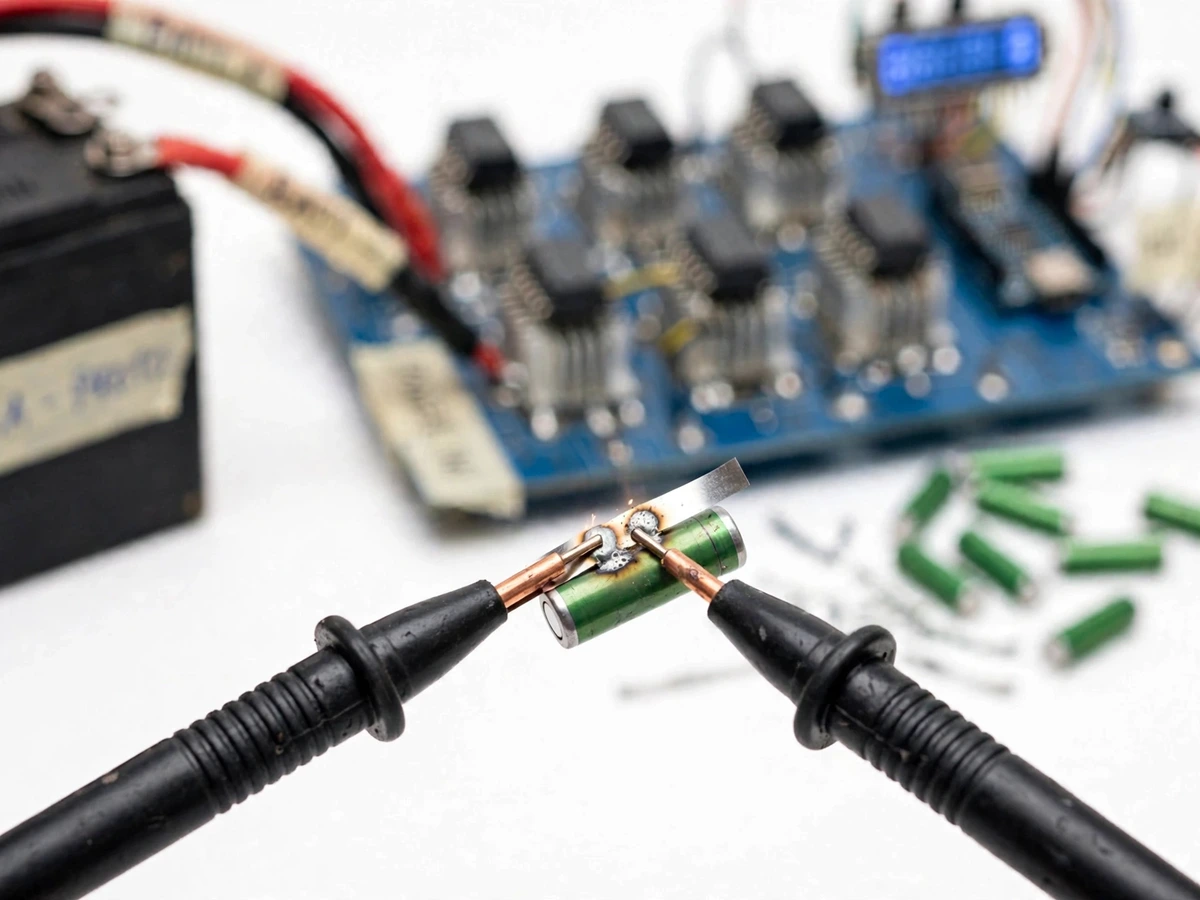
Sets pulse time, positions the probes and taps the foot pedal.
Follow the working sequence
How it works
- A 12 V source battery (SLA or LiFePO4 with low internal resistance) sits across the welder's heavy-gauge busbars; the parallel MOSFET bank connects the busbars to the two copper probe pens.
- The Arduino Nano reads the pulse time (1–100 ms) and mode set through the encoder and buttons, and shows both on the LCD.
- The builder lays the nickel strip on the cell terminal, presses both probes onto it, and taps the foot pedal (or uses auto-fire on probe contact).
- The Nano drives the MOSFET gates through a gate-driver stage with a strong pull-down, switching the full bank on for exactly the set pulse — dumping the battery's energy as a high-current pulse through the strip-to-cell contact points.
- In dual-pulse mode, the firmware fires a short pre-pulse to clear oxide, waits the configured gap, then fires the main weld pulse.
- The nickel strip fuses to the cell terminal by resistive heating at the contact points; the probes lift and the process repeats for the next terminal.
- Weld quality is verified on scrap strip first: the builder adjusts pulse time until a test strip tears and leaves metal on the cell instead of peeling clean — only then do real cells get welded.
Tech stack:
- Arduino Nano (ATmega328P)
- IRLB3034 power MOSFETs in a parallel bank
- 12 V SLA / LiFePO4 source battery (buyer-arranged)
- 16×2 LCD + rotary encoder interface
- Copper electrode probe pens
- Foot-pedal trigger
- Arduino IDE (C/C++ firmware)
| Parameter | Value |
|---|---|
| Pulse duration | 1–100 ms, adjustable (firmware-set) |
| Pulse mode | Single or dual pulse, menu-configurable |
| Power source | 12 V battery, design 20–40 Ah SLA or 12 V LiFePO4 (battery-dependent) |
| Switching | Parallel power MOSFET bank (design 6 × IRLB3034, Rds(on) max 1.7 mΩ each at Vgs 10 V — datasheet) |
| Peak pulse current | Expected 300–600 A (battery and cable dependent; not a measured claim) |
| Controller | Arduino Nano |
| Display | 16×2 LCD with pulse time and mode readout |
| Electrodes | Copper probe pens with replaceable tips |
| Nickel strip | Designed for 0.1–0.15 mm pure nickel strip; up to 0.2 mm with a strong battery (design target) |
| Trigger | Foot pedal, push button, or auto-fire on probe contact |
| Duty cycle | Approximately one weld every 5–10 s (design target; MOSFET-temperature dependent) |
| Build | Open student-prototype layout with labeled wiring |
Project features
- [Parallel MOSFET pulse switching] Six IRLB3034 power MOSFETs switch the weld pulse from a 12 V battery; the datasheet Rds(on) is max 1.7 mΩ per device at Vgs 10 V, so the pulse energy goes into the weld, not the switches.
- [1–100 ms Arduino timer] The Nano sets the weld pulse duration with millisecond resolution through buttons and a rotary encoder, shown live on the 16×2 LCD; hardware-timer firmware makes the pulse length exact.
- [Dual-pulse mode] A short pre-pulse breaks through surface oxide, followed by a configurable gap and the main weld pulse — enabled or disabled from the on-screen menu.
- [Foot-pedal trigger with auto-fire] Trigger by foot pedal, hand push-button, or auto-fire when the probes touch the strip; debounce plus a re-arm delay prevents accidental double-firing.
- [Copper probe pens with replaceable tips] Handheld dual probes with solid copper electrodes; tips are re-sharpenable and replaceable as they wear.
- [Fused high-current path] An automotive blade fuse and heavy-gauge cabling protect the source battery and wiring against accidental shorts.
- [Heatsinked MOSFET bank with fan] The MOSFET bank mounts on aluminium heatsinks with a 12 V cooling fan, supporting the design duty cycle of about one weld every 5–10 seconds.
- [Scrap-strip calibration procedure] A documented test-weld routine on spare nickel strip so the student dials in the right pulse time for their own battery and strip before touching real cells.
What is included
- Working prototype: MOSFET switching board on heatsinks with cooling fan, Arduino Nano timer board with LCD, dual copper probe pens, foot-pedal trigger
- Sample 18650 cells, 0.1 and 0.15 mm nickel strip samples, and spare copper probe tips
- 12 V source battery NOT shipped — arranged locally by the student (heavy to ship); the build is designed around a 20–40 Ah SLA or 12 V LiFePO4 pack
- Firmware source code with timer and dual-pulse logic
- Circuit and wiring documentation with component list
- Test-weld calibration procedure sheet for scrap-strip tuning
- Project report PDF, PPT presentation, viva Q&A document
- Project abstract PDF
Limitations & prerequisites
- Weld quality depends on the source battery's internal resistance and state of charge — the buyer must run the test-weld procedure on scrap strip and dial in their own pulse time; no weld strength is claimed without that calibration.
- Designed for 0.1–0.15 mm pure nickel strip; 0.2 mm is a stretch goal needing a strong low-resistance battery. Nickel-plated steel strips behave differently and need longer pulses.
- Duty cycle is limited by MOSFET heating: approximately one weld every 5–10 seconds (design target). Rapid repeat welding can overheat the MOSFET bank even with heatsinks and fan.
- High-current safety: 12 V is low voltage but the pulse path carries hundreds of amps; a short can melt wire and start fires. Work supervised, wear safety glasses, keep the fuse in circuit, and never leave cells unattended while welding.
- Only weld healthy cells: never weld swollen, punctured, overheated or unknown-history lithium cells — damaged cells can vent or catch fire.
- This is an educational prototype, not an industrial-certified tool; results vary with battery, strip, probe pressure and operator practice.
Frequently Asked Questions
How is this different from the microwave-transformer (MOT) spot welder?
The MOT-based welder rewound a mains transformer — bulky, tied to wall power and inherently imprecise. This build is battery-powered: a 12 V battery with MOSFET switches makes it portable, low-voltage, and gives millisecond timer precision that a transformer build cannot.
What battery powers the welder?
A 12 V SLA (20–40 Ah) or 12 V LiFePO4 pack with low internal resistance — the pulse current comes from the battery, so its health decides weld quality. It is arranged locally and is not shipped with the kit.
What strip thickness can it weld?
0.1–0.15 mm pure nickel strip is the design target; 0.2 mm is possible with a strong battery and longer pulses, confirmed by the buyer's own test welds on scrap strip.
Is it safe to weld lithium cells?
Spot welding is the correct low-heat method for pack assembly, but hundreds of amps demand respect: use the fuse, wear safety glasses, weld only healthy cells, and keep a fire-safe workspace. The kit includes a safety procedure sheet.
What will I receive with the project?
The working prototype (MOSFET board, timer board with LCD, copper probes, foot pedal), sample cells and nickel strips, firmware, wiring documentation, the calibration procedure, report, PPT, viva Q&A and abstract PDF. The 12 V source battery is arranged locally.
Is this project suitable for a final-year project?
Yes — for Electrical and Electronics/E&TC programs. It demonstrates power electronics, MOSFET gate drive, microcontroller timing, high-current design and safety engineering. Suitable for B.E./B.Tech final-year projects in Electrical, Electronics and IoT.
Components & software requirements
- Arduino Nano (ATmega328P)
- IRLB3034 power MOSFETs in a parallel bank
- 12 V SLA / LiFePO4 source battery (buyer-arranged)
- 16×2 LCD + rotary encoder interface
- Copper electrode probe pens
- Foot-pedal trigger
- Arduino IDE (C/C++ firmware)
Delivery information
Built-to-order project. Delivery timeline is shared after order confirmation based on current queue.
Support terms
Complete documentation, setup guide, and viva preparation included. Support for setup and explanation provided.
Download free synopsis (PDF)
Enter your name and email — the synopsis PDF downloads immediately. We may send occasional project updates; no spam, unsubscribe anytime.