
More project photos (3)
The problem
Pick-and-place — moving parts between stations, loading machines, sorting products — is the most common task in factory automation, but industrial robot arms cost lakhs of rupees and sit behind safety fences. Students learning automation rarely touch that loop: textbooks describe degrees of freedom and kinematics, yet the link between a joint angle and a gripper position stays abstract. The core ideas, though, are all reproducible at low cost: a joint is a servo, a programmed task is a timed sequence of servo angles, and the "teach pendant" workflow of factory robots is simply recording a motion and replaying it. This project ties those ideas together in a 4-DOF servo arm on an Arduino — one students can program, recalibrate and explain, performing real pick-and-place cycles and the teach-and-replay workflow used on production lines.
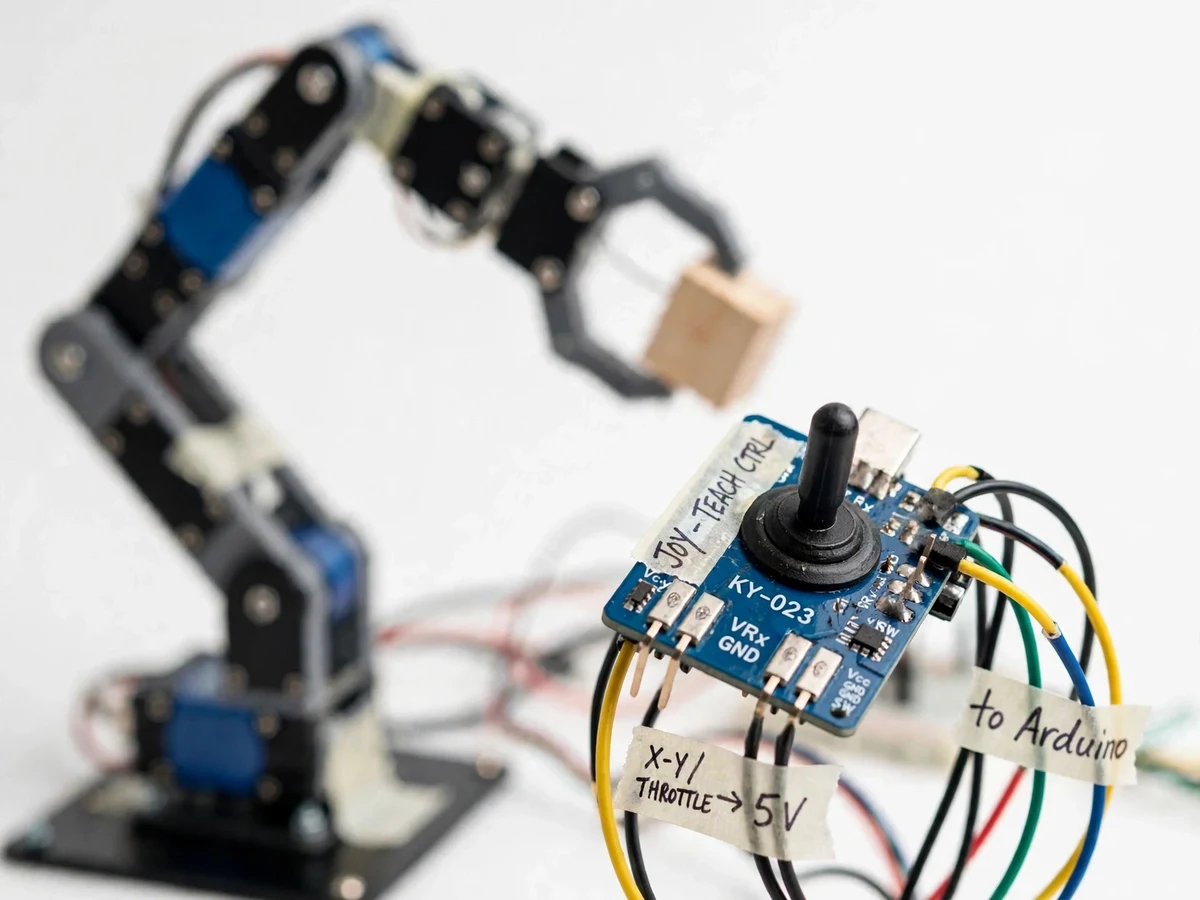
Guides the arm by hand with the joystick in teach mode.
Follow the working sequence
How it works
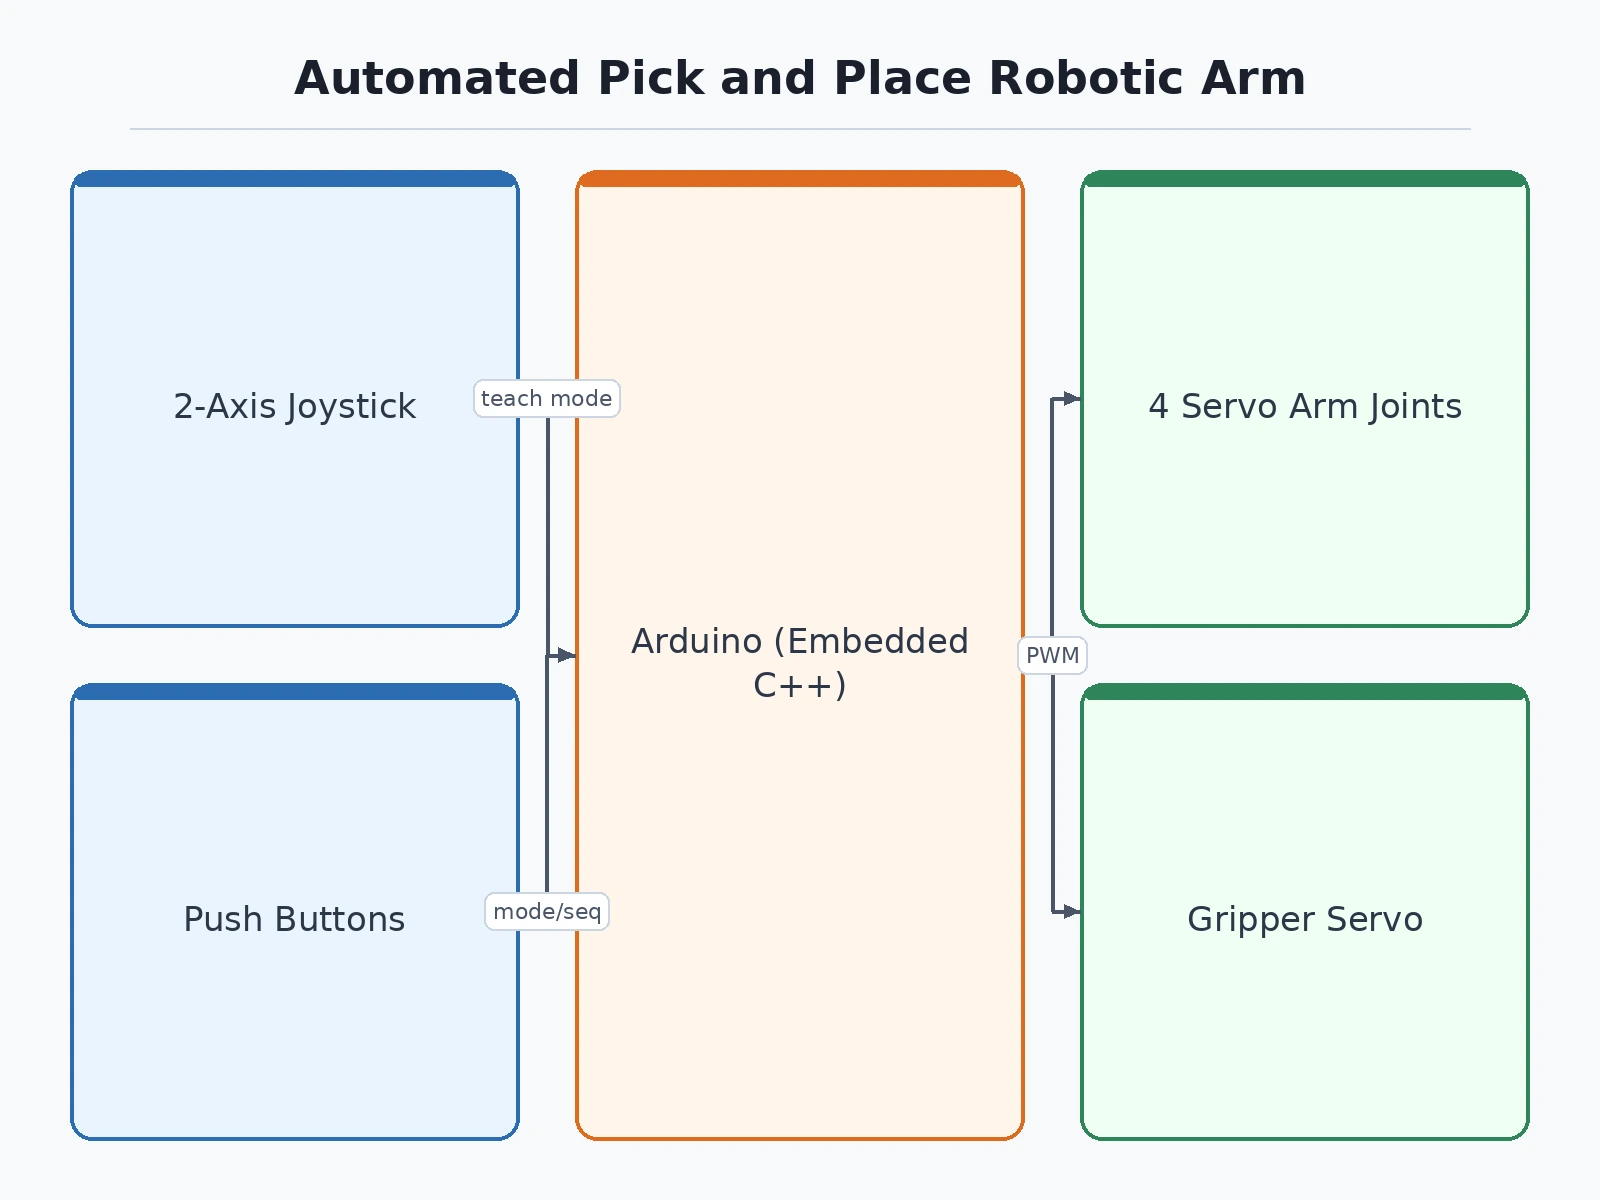
- The Arduino generates 50 Hz PWM signals; each servo positions itself according to the pulse width (roughly 1–2 ms for 0–180°).
- In teach mode, you move the arm with the 2-axis joystick; the Arduino samples each servo's angle at fixed time steps and stores the trajectory in memory.
- In replay mode, the firmware plays the recorded angles back with eased acceleration, so motion is smooth instead of jerky.
- Pre-programmed routines (e.g. pick from tray A, place at tray B) are defined as joint-angle sequences in firmware and executed in order.
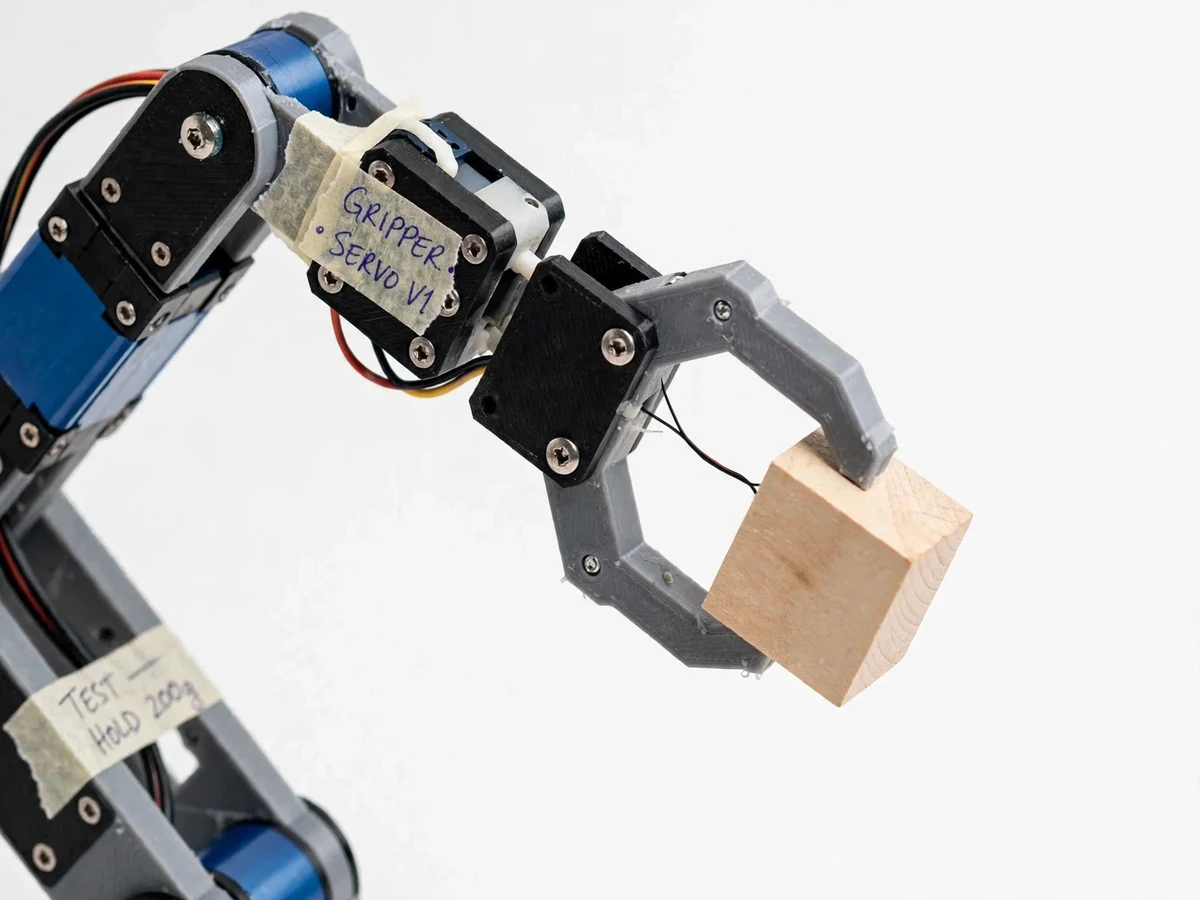
- The gripper servo closes to a calibrated pulse width to grip the object, the base rotates to the destination, and the gripper opens to release it.
- Forward kinematics in the report maps joint angles to gripper position, closing the loop between the math and the hardware.
Project features
- 4 degrees of freedom: base yaw, shoulder pitch, elbow pitch and wrist/gripper
- Joystick teach mode: guide the arm by hand once, replay the motion automatically
- Pre-programmed pick-and-place sequences stored in firmware (editable)
- Smooth motion profiles — eased acceleration instead of jerky servo jumps
- Gripper with adjustable closing force for small objects (cubes, bottles, components)
- Mode and sequence control via push buttons and serial commands
- Runs a default sequence standalone on power-up
- Acrylic/metal arm kit with ball-bearing base rotation
What is included
- Assembled 4-DOF robotic arm
- Full component list with the exact servo models, kit and power supply used
- Arduino firmware: teach mode, replay, pre-programmed sequences (commented)
- Circuit and wiring diagram, including separate servo power wiring
- Servo centering and calibration guide
- Assembly guide
- Project report PDF (kinematics, design, testing, results)
- PPT presentation
- Viva Q&A document
FAQs
- What does "4-DOF" mean? Four independent joints — base rotation, shoulder pitch, elbow pitch and wrist/gripper. Four is the minimum needed to position the gripper anywhere in 3D space above the base for pick-and-place work.
- How does the joystick teach mode work? The joystick's axes map to joint movements; while you guide the arm, the Arduino records each servo's angle at fixed time steps. Press replay and it executes the identical motion — the same teach-and-repeat workflow factory robots use.
- Why do the servos need a separate power supply? Four servos under load can draw 3–5 A, far more than the Arduino's regulator can supply. A shared supply causes voltage dips, resets and jitter, so the build uses a dedicated 5–6 V supply for servos with a common ground to the Arduino.
- How is the gripper calibrated? The closing pulse width is tuned so the gripper holds the demo objects firmly without crushing them; the calibration guide walks through centering every servo before the first run.
- What kinematics does the project cover? The report works through forward kinematics — computing gripper position from joint angles — with examples, and the firmware's joystick-to-angle mapping demonstrates the control side. Inverse kinematics is covered as theory with references.
- What objects can it pick up? Small, light items: wooden cubes, plastic bottles, electronic components, table-tennis balls. Payload is roughly 100–200 g at full extension.
Advantages
- Working 4-DOF arm on an Arduino: base yaw, shoulder pitch, elbow pitch and wrist/gripper, with the Arduino generating 50 Hz PWM signals and each servo positioning by pulse width (~1–2 ms for 0–180°).
- Joystick teach mode replicating factory workflow: guide the arm by hand once while the Arduino samples each servo's angle at fixed time steps, then replay the identical motion with eased acceleration instead of jerky servo jumps.
- Pre-programmed pick-and-place sequences stored in editable firmware, plus a default sequence that runs standalone on power-up — pre-programmed routines execute as joint-angle sequences in firmware order.
- Kinematics grounded in math: the report works through forward kinematics mapping joint angles to gripper position, closing the loop between the equations and the hardware.
- Complete build package: assembled arm, exact component list with servo models, commented Arduino firmware (teach, replay, sequences), circuit and wiring diagram including separate servo power wiring, servo centering and calibration guide, assembly guide, report PDF, PPT and viva Q&A.
Disadvantages
- Hobby servos repeat to about ±2–3° per joint — fine for demos, not for precision assembly.
- Payload is roughly 100–200 g at full reach; heavier objects overload the shoulder servo.
- The servos need a dedicated 5–6 V high-current supply (3–5 A under load); running them from the Arduino's 5 V pin causes brownouts and jitter.
- Recorded teach sequences are limited by onboard memory; very long recordings would need SD-card storage (noted as future scope).
- The build is a study model of industrial automation, not an industrial device — it is not rated for continuous production use.
Limitations & prerequisites
- Hobby servos repeat to about ±2–3° per joint — fine for demos, not for precision assembly.
- Payload is roughly 100–200 g at full reach; heavier objects overload the shoulder servo.
- The servos need a dedicated 5–6 V high-current supply; running them from the Arduino's 5 V pin causes brownouts and jitter.
- Recorded teach sequences are limited by onboard memory; very long recordings would need SD-card storage (noted as future scope in the report).
- The build is a study model of industrial automation, not an industrial device — it is not rated for continuous production use.
Components & software requirements
- Arduino UNO/Nano (ATmega328P) with Arduino IDE
- 4× servo motors — MG996R metal-gear (base/shoulder) + SG90 (wrist/gripper), 50 Hz PWM
- 4-DOF arm kit: acrylic/metal links, base bearing, gripper mechanism
- 2-axis analog joystick for teach mode; push buttons for mode select
- 5–6 V high-current servo power supply, separate from the logic supply
- Embedded C++ firmware: teach-record, replay, pre-programmed sequences
- Forward/inverse kinematics worked examples in the report
- USB serial link for commands and debugging
Specifications
| Parameter | Value |
|---|---|
| Microcontroller | Arduino UNO/Nano (ATmega328P, 16 MHz) |
| Degrees of freedom | 4 (base, shoulder, elbow, wrist + gripper) |
| Servo control | 50 Hz PWM, 1–2 ms pulse width, ~180° range |
| Base/shoulder servos | MG996R metal gear, ~10–11 kg·cm stall torque |
| Wrist/gripper servos | SG90, ~1.8–2.5 kg·cm stall torque |
| Reach | ~25–35 cm (kit-dependent) |
| Payload | ~100–200 g at full extension |
| Teach storage | Recorded sequences in EEPROM / RAM (firmware-configurable) |
| Power | 5–6 V / 3–5 A servo supply; USB or 9 V logic supply |
| Repeatability | ±2–3° per joint (hobby-servo grade) |
Download free synopsis (PDF)
Enter your name and WhatsApp number — the synopsis PDF downloads immediately. We may send occasional project updates on WhatsApp; no spam.