More kit photos (2)
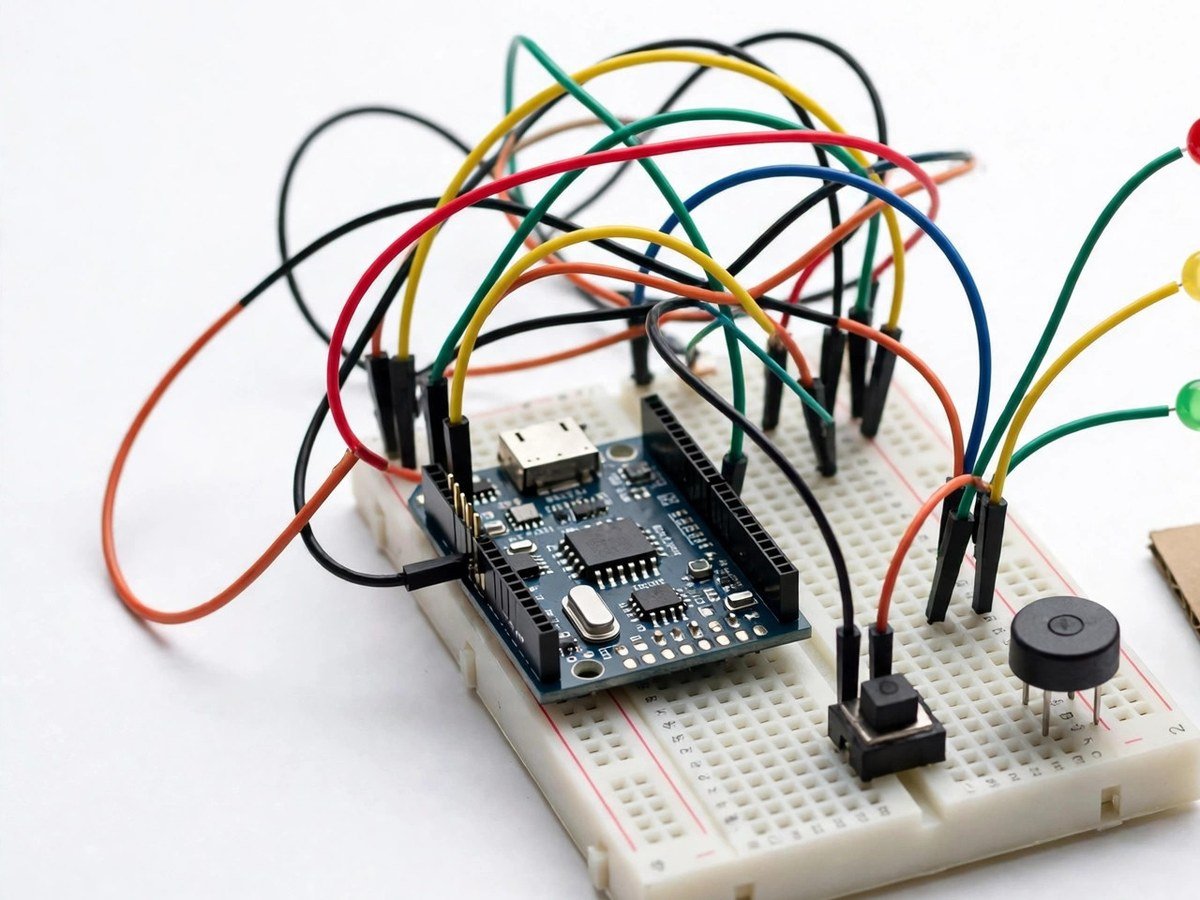
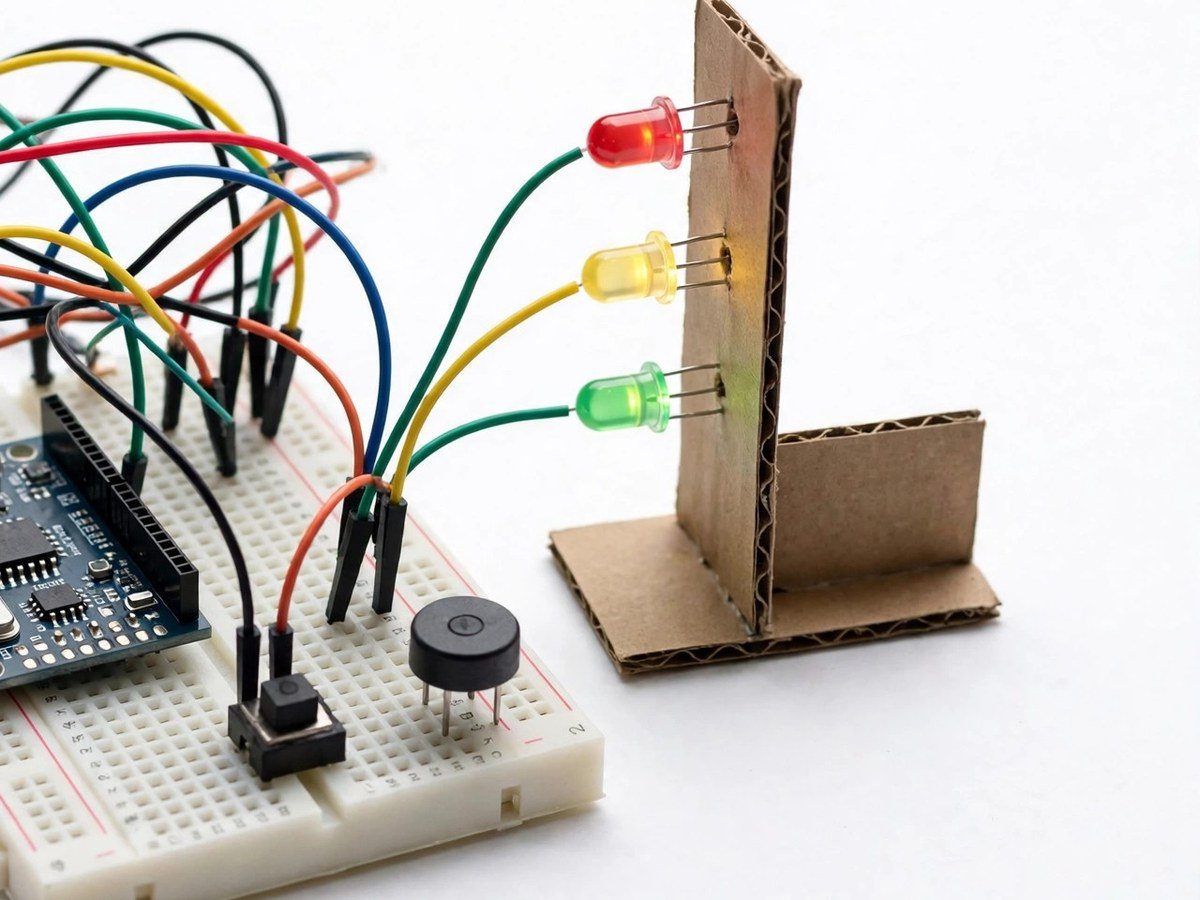
Build time: 45–60 minutes — the easiest first kit, good for a first demo in a new school · Soldering: No
The Problem
Timing and sequencing are hard to teach from a diagram because nothing visibly happens in the right order. A traffic light fixes that: every student already knows what red, yellow, and green mean, so the class can judge the build by eye before any explanation is needed. If the timing is wrong, the light is wrong, and everyone sees it. The pedestrian button adds the second idea that matters: a system that normally runs on a fixed cycle must also respond to a person. That combination — a fixed sequence plus a human interrupt — appears in lifts, crossings, and factory controls, and this kit is the cheapest, safest way for a teacher to show it working.
How It Works
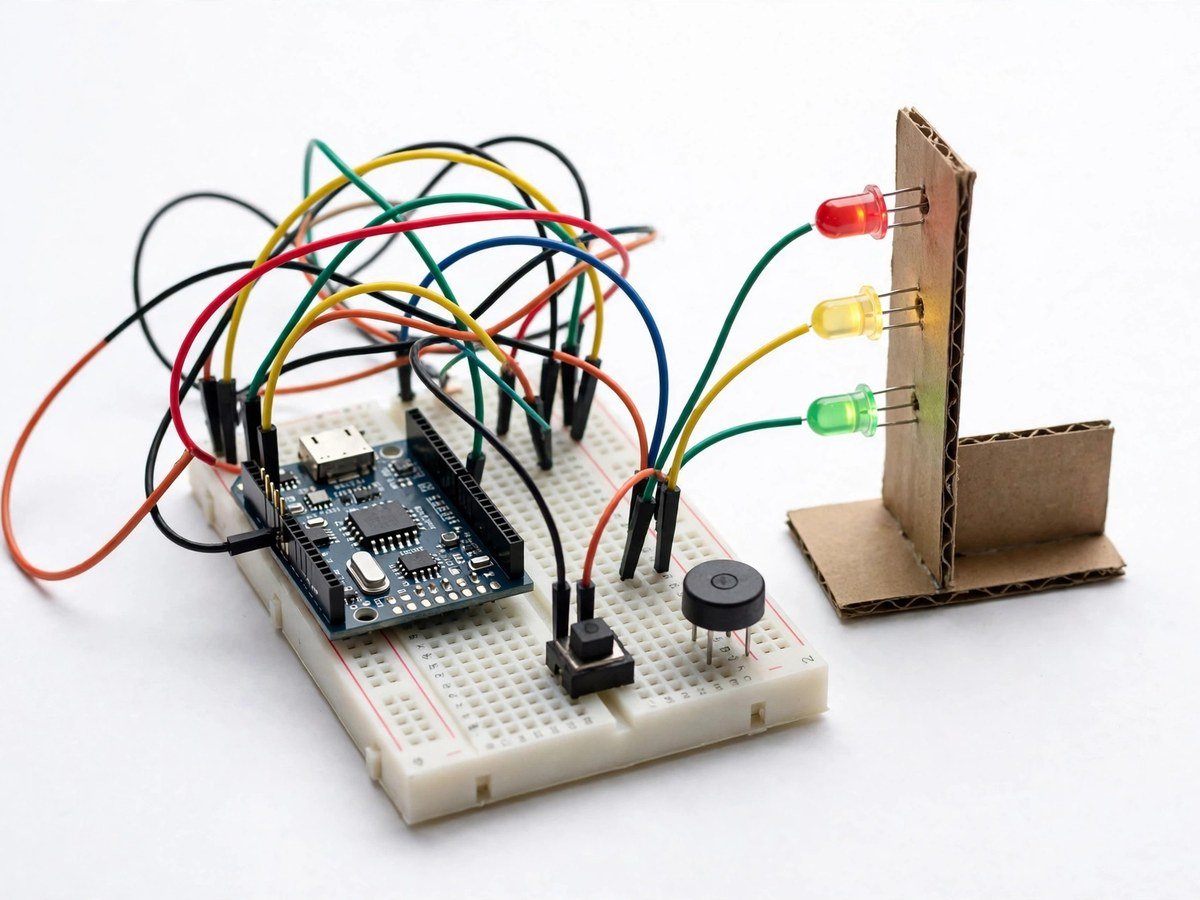
- Place the board on the breadboard and connect the red, yellow, and green LEDs, each in its own position, following the wiring guide.
- Connect the push button as the pedestrian input and the buzzer as the audible signal.
- Upload the ready code. No phone or app is needed.
- Run the normal cycle and time each light with a stopwatch.
- Press the pedestrian button during the cycle and watch how the sequence changes to let a pedestrian cross.
- Redesign the cycle as a class: change how long each light stays on, then test whether the new cycle is safer or slower.
- Discuss the trade-off the class just made: longer green for vehicles means longer waiting for pedestrians, and the reverse.
- Pack the LEDs and button back carefully, as small parts are the first things a classroom kit loses.
Features
- Three-colour LED sequence that runs on its own once started.
- A pedestrian push button that interrupts the normal cycle.
- A buzzer for the audible crossing signal.
- Ready code, so the first run needs no programming and no phone.
- Breadboard build only, so the classroom build needs no soldering.
What Is Included
- Arduino-compatible board
- Red, yellow and green LEDs
- Push button (pedestrian)
- Buzzer
- Breadboard
- Wires
Every pack also includes: all parts tested before dispatch; step-by-step assembly guide in English and Marathi; ready code where code is needed; a teacher guide with 3 classroom activities, common mistakes, and answers; spare jumper wires and a spare sensor or LED where the part is fragile; and WhatsApp support for the teacher.
Demo video: no video link is shown on this page yet. A demo video link will be added here only when a real video for this kit exists.
Tech Stack
- Arduino-compatible board
- Red, yellow and green LEDs
- Push button
- Buzzer
- Breadboard
Specifications
| Parameter | Value |
|---|---|
| Controller | Arduino-compatible board |
| Outputs | Red, yellow and green LEDs + buzzer |
| Input | Push button (pedestrian) |
| Power | Board power as supplied in the pack |
| Build time | 45–60 minutes |
| Soldering | No |
| Coding level | Ready code; timing values can be discussed as a class |
| Phone or computer needed | Computer only to upload the ready code once |
| Wi-Fi needed | No |
Limitations
- This is a tabletop model of a traffic light. It does not control real traffic and must not be used at a real crossing.
- The LEDs are small indicator lights, not road-grade signal lamps, and they are only visible at classroom distance.
- Timing values in the ready code are teaching examples. Real traffic timing is set by traffic engineers for each junction, not copied from a classroom kit.
Frequently Asked Questions
Do students need to know coding?
No. Ready code is included. The class can run the cycle and then discuss changing the timings.
Does this kit need a phone?
No. No phone or app is needed at any stage.
Why is this a good first kit for a new school?
It is the shortest build in the set, every student already understands the traffic light, and a wrong timing is visible at once.
Is soldering needed?
No. The classroom version uses a breadboard.