More kit photos (2)
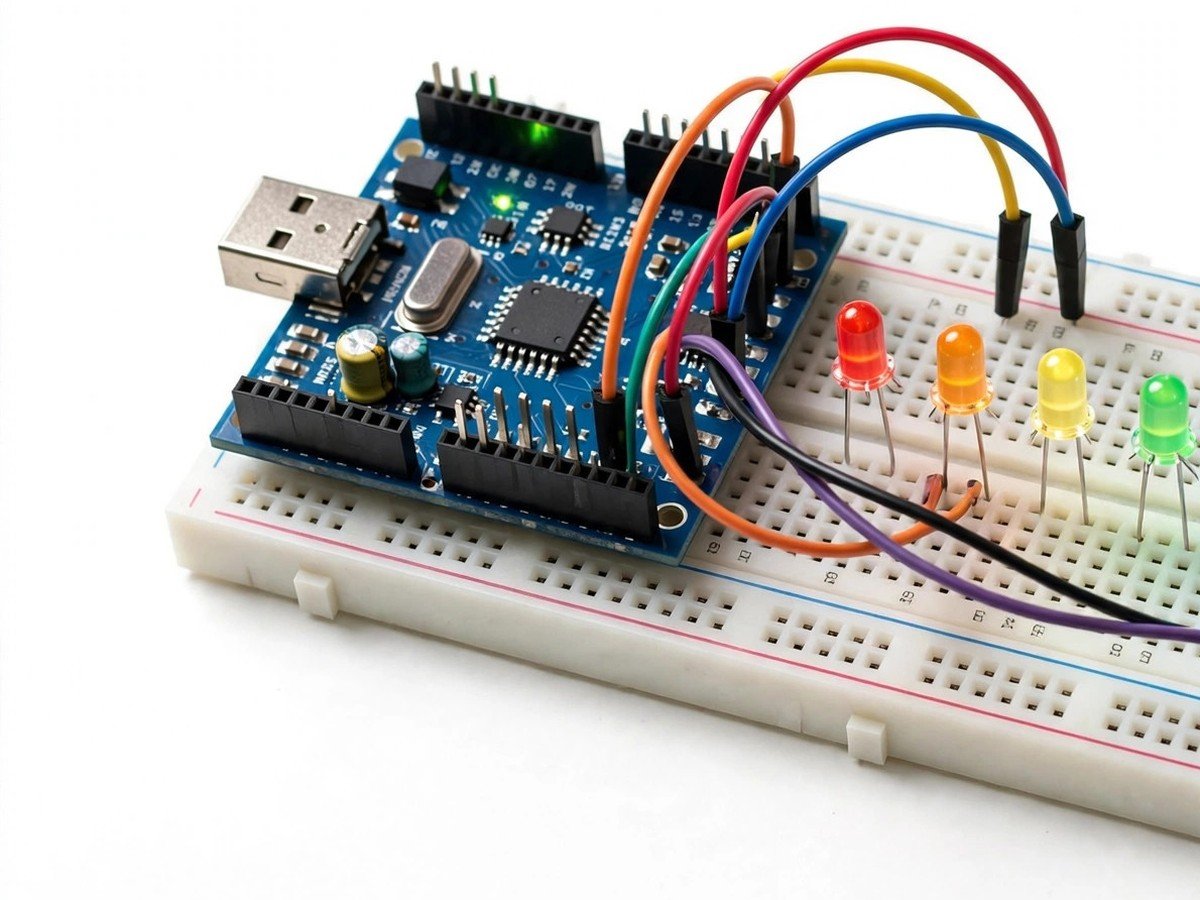
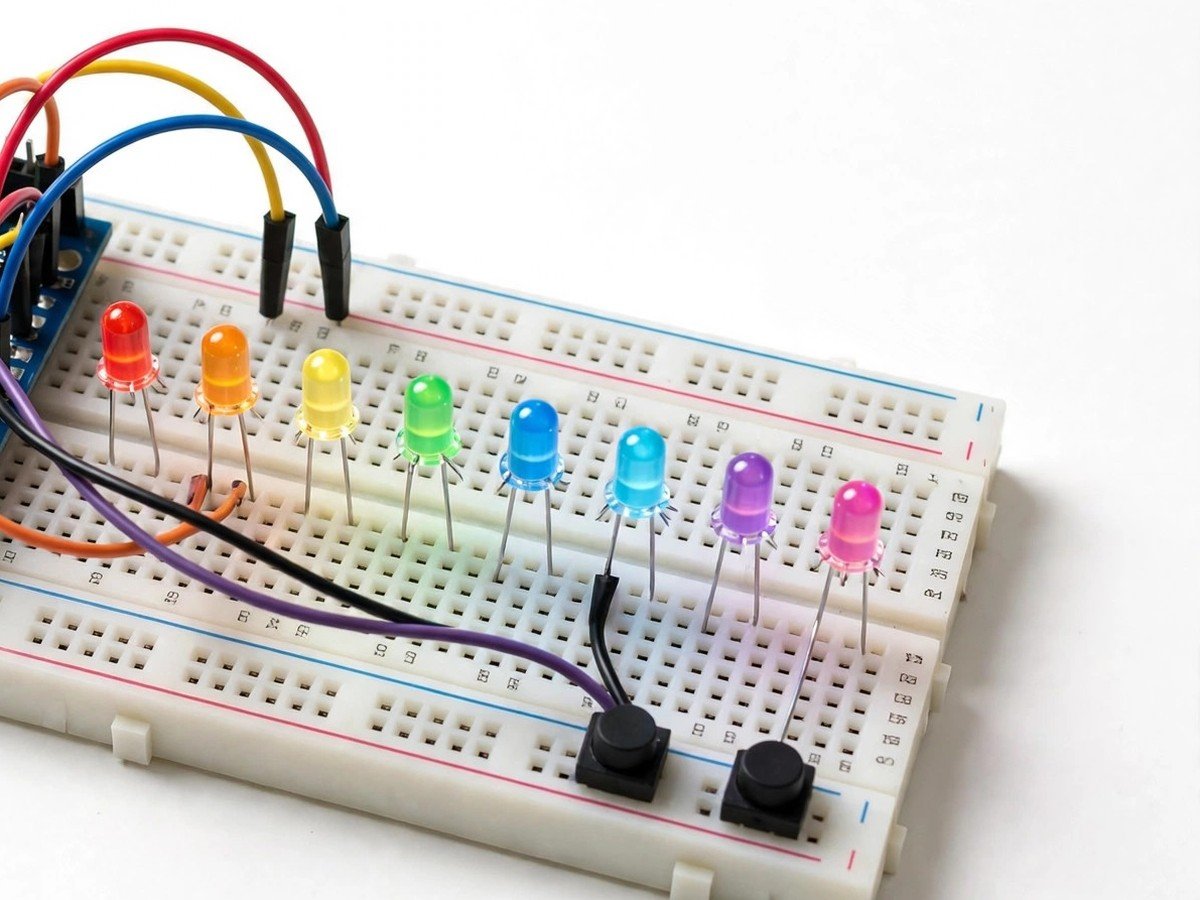
Build time: 45 minutes · Soldering: No
Safety note: the LEDs run on low-voltage board power only, so the pattern board is safe to handle during a lesson.
The Problem
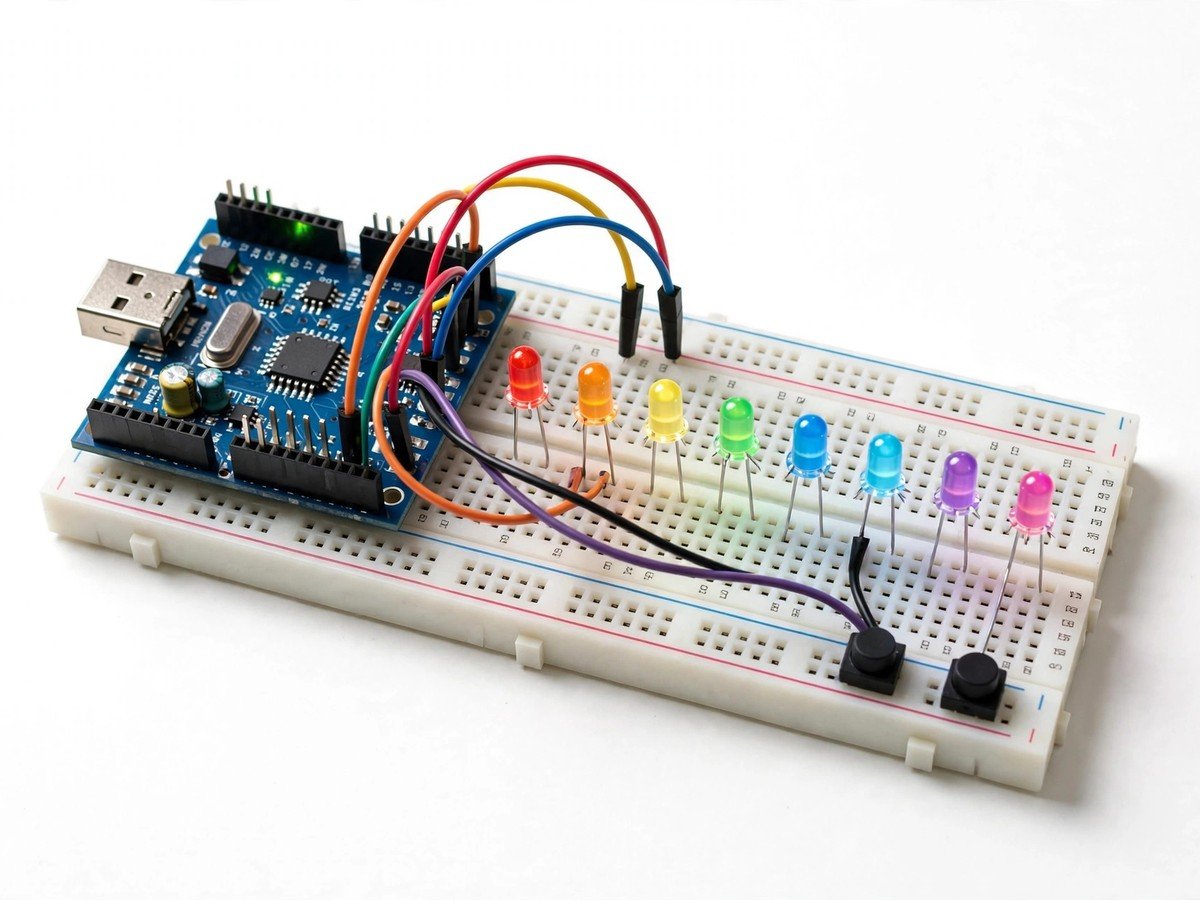
Sequences are easy to recite and hard to understand, because a list of steps on paper does nothing. A row of eight LEDs changes that: the sequence becomes something the whole class can watch, count, and argue about. A chase moves one light along the row, a blink flashes them together, and a wave builds up and dies away, and each pattern is just a list of steps plus a timing value. When the class invents its own pattern, the work is honest programming even before any code is written: write the steps in order, say how long each step lasts, and then test whether the LEDs do what the list says. If they do not, the list was wrong, not the LEDs, and fixing the list is the lesson.
How It Works
- Connect the eight LEDs in a row and the push buttons to the board through the breadboard, following the wiring guide.
- Upload the ready code and check that the first pattern, the chase, runs along the row.
- Count the beat as a class: clap or tap as each LED lights, so the timing of the pattern becomes audible.
- Press a button to change the pattern, and describe the new pattern in words before anyone looks at the code.
- Compare the patterns: chase, blink, and wave, and agree what is different in each list of steps.
- Invent a pattern as a class and write it as a numbered list of steps with a timing value for each step.
- Change the pattern order and timing values in the ready code as the guide shows, upload, and test whether the LEDs do what the list says.
- Fix the list where the LEDs disagree with it, then pack the LEDs back carefully, as bent legs are the most common classroom damage.
Features
- Eight LEDs in a row, so every pattern is visible across the room without a screen.
- Named patterns — chase, blink, and wave — so the class can compare sequences instead of watching one effect.
- Push buttons to change pattern, so students control the sequence by hand.
- Class-invented patterns, so students write a sequence as a list of steps and test it against the LEDs.
- Breadboard build only, so the classroom build needs no soldering.
What Is Included
- Arduino-compatible board
- 8 LEDs
- Push buttons
- Breadboard
- Jumper wires
- Battery holder
Every pack also includes: all parts tested before dispatch; step-by-step assembly guide in English and Marathi; ready code where code is needed; a teacher guide with 3 classroom activities, common mistakes, and answers; spare jumper wires and a spare sensor or LED where the part is fragile; and WhatsApp support for the teacher.
Demo video: no video link is shown on this page yet. A demo video link will be added here only when a real video for this kit exists.
Tech Stack
- Arduino-compatible board
- 8 LEDs
- Push buttons
- Breadboard
- Jumper wires
Specifications
| Parameter | Value |
|---|---|
| Controller | Arduino-compatible board |
| Outputs | 8 LEDs in a row |
| Inputs | Push buttons, pattern change |
| Power | Battery holder (batteries as supplied in the pack) |
| Build time | 45 minutes |
| Soldering | No |
| Coding level | Ready code; pattern order and timing values can be changed |
| Phone or computer needed | Computer only to upload the ready code once |
| Wi-Fi needed | No |
Limitations
- This kit teaches sequences and timing with LEDs. It does not drive large displays, motors, or mains lighting, and its patterns are teaching examples, not a lighting product.
- Patterns are limited by the eight LEDs in a row. A pattern that needs more outputs, or a matrix of LEDs, is a different build.
- Timing values in the ready code are teaching examples. Very fast patterns blur together to the eye, which is a real limit of human vision, not a fault in the kit.
- LED legs bend easily. A bent or loose LED may stay dark or flicker until it is reseated in the breadboard.
Frequently Asked Questions
Do students need to know coding?
No. Ready code is included. Students change pattern order and timing values, and invent patterns as lists of steps first.
Why does a very fast pattern look like all the LEDs are on?
The eye cannot separate steps faster than it can follow. Slow the timing value down and the steps become visible again.
Can students invent their own pattern?
Yes. The class writes the pattern as a numbered list of steps with timings, then changes the pattern in the ready code as the guide shows.
Is soldering needed?
No. The classroom version uses a breadboard.