
More project photos (2)
The problem
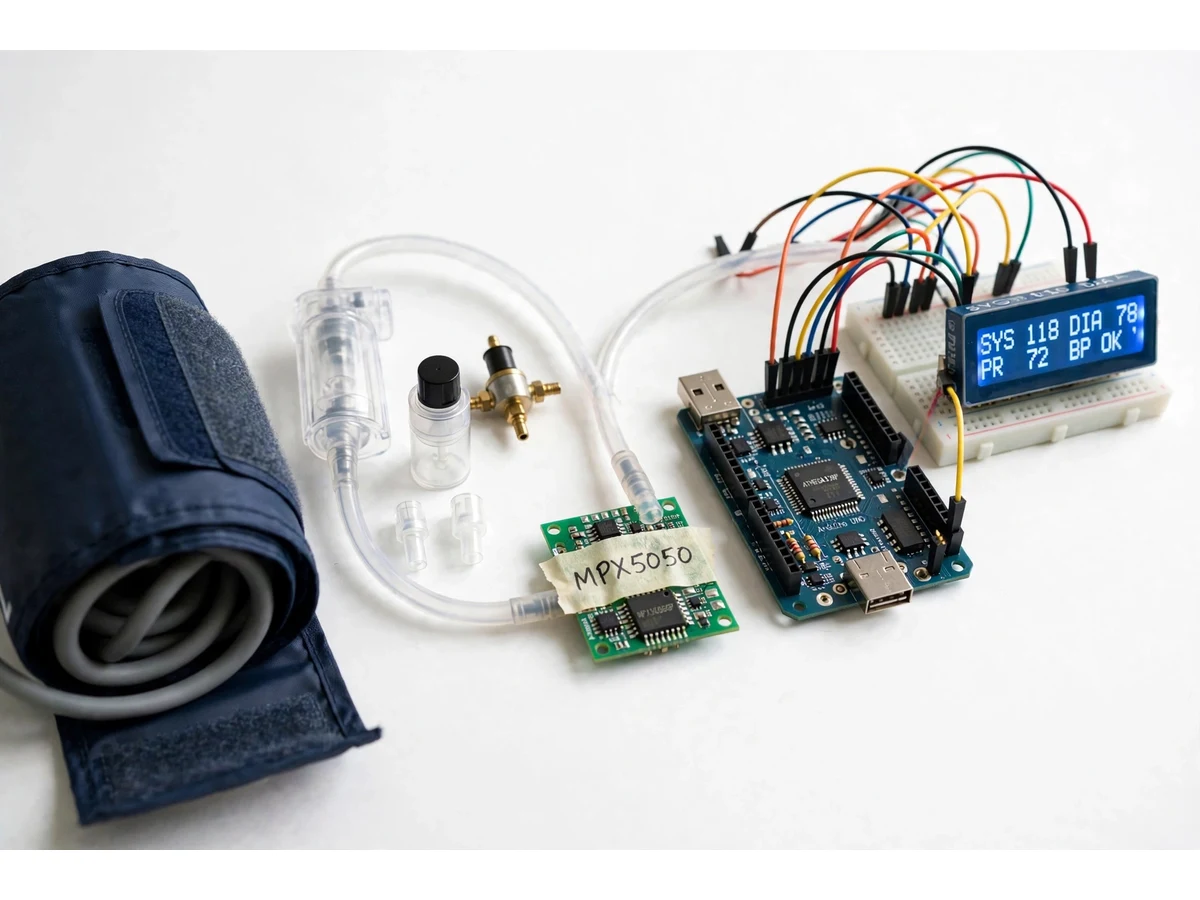
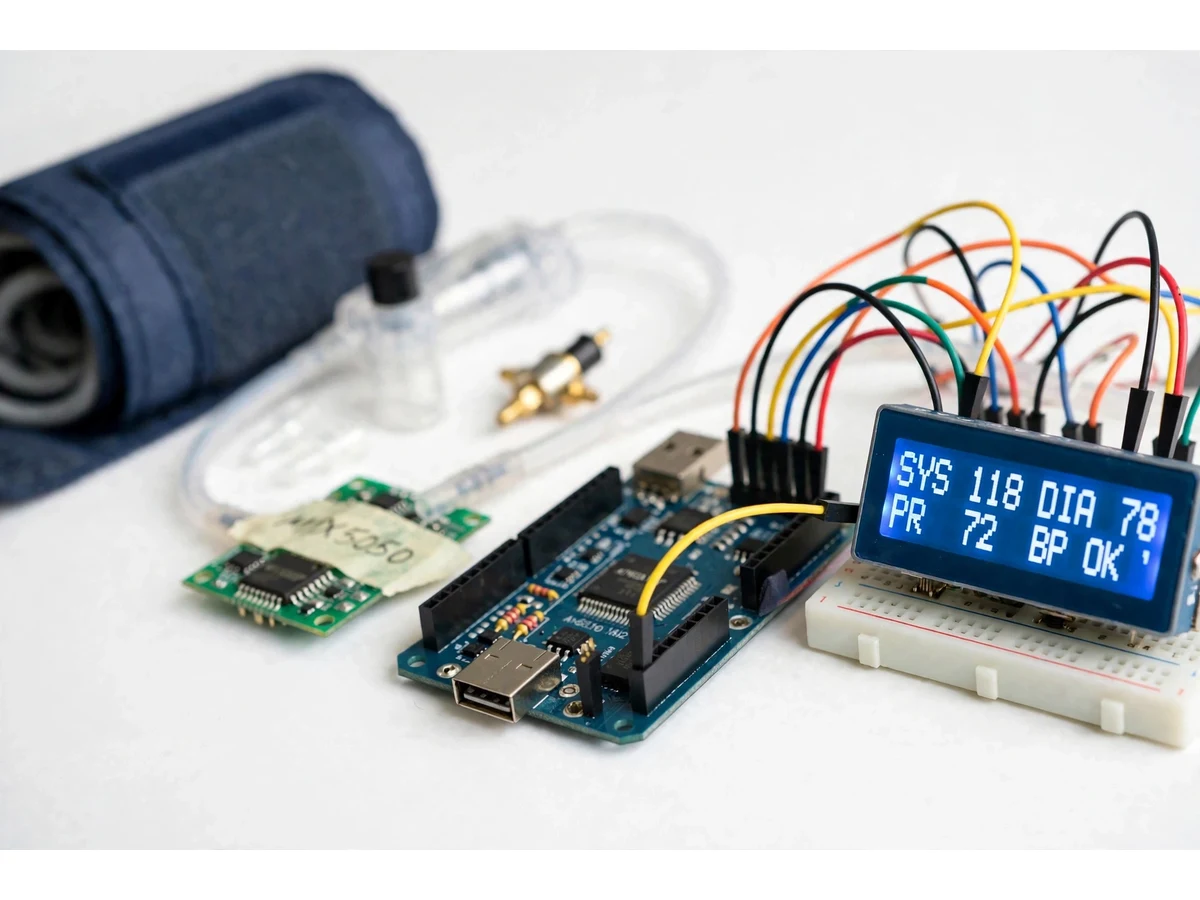
A digital blood pressure monitor measures blood pressure without a stethoscope: a cuff wrapped around the upper arm is inflated until it briefly stops blood flow, then deflated slowly while a pressure sensor watches the tiny pressure oscillations caused by each heartbeat. This project builds that instrument as a student prototype around the NXP MPX5050 pressure sensor and an Arduino Uno. The sensor converts cuff pressure into a voltage, the Arduino separates the slow cuff-pressure trend from the small heartbeat oscillations, and the oscillometric algorithm estimates systolic and diastolic pressure from the shape of the oscillation envelope. A mini air pump, a solenoid valve and a 16x2 LCD complete the build, so the whole measurement chain — pneumatics, sensing, signal conditioning and display — is visible and explainable in one compact prototype. This project is an academic prototype and is not intended to replace certified medical equipment, professional diagnosis or clinical decision-making.
Fits the arm cuff snugly on the upper arm and presses the start button.
Follow the working sequence
How it works
The measurement runs end to end as one automatic cycle: the cuff goes on the upper arm, the pump inflates it above the expected systolic pressure, the valve lets air out slowly at approximately 3 mmHg per second, and the MPX5050 sensor watches cuff pressure the whole time. As pressure falls, each heartbeat pushes a small oscillation into the cuff; the Arduino filters the sensor voltage, separates these oscillations from the falling pressure trend, and builds an envelope of oscillation amplitude against cuff pressure. The envelope peaks near the mean arterial pressure, and the firmware estimates systolic pressure where the envelope reaches its rising-side fraction and diastolic pressure where it reaches its falling-side fraction, then shows systolic pressure, diastolic pressure and pulse rate on the LCD and opens the valve fully to release the cuff.
- The user fits the arm cuff snugly on the upper arm and presses the start button; the Arduino checks the sensor baseline at 0 kPa before starting.
- The mini air pump inflates the cuff to a design-target peak of approximately 160 mmHg, above the expected systolic pressure, while the LCD shows live cuff pressure.
- The pump stops and the solenoid valve opens slightly, releasing air at approximately 3 mmHg per second (design target) while the MPX5050 output is sampled continuously by the Arduino's 10-bit ADC.
- The firmware low-pass filters the samples, removes the slow pressure trend, and records the amplitude of each heartbeat oscillation as cuff pressure falls.
- The oscillation amplitudes form an envelope; its peak marks approximately the mean arterial pressure, and systolic and diastolic pressures are estimated from the envelope's rising-side and falling-side fractions (design-target characteristic ratios of approximately 0.55 and 0.85).
- The LCD displays systolic pressure in mmHg, diastolic pressure in mmHg and pulse rate in beats per minute, the buzzer sounds once, and the valve opens fully to release the remaining cuff pressure.
Tech stack:
- Arduino Uno (ATmega328P)
- MPX5050 pressure sensor
- Mini air pump · solenoid valve
- Arm cuff · silicone tubing
- 16x2 LCD display
- RC low-pass filter · signal conditioning
- Arduino IDE · Embedded C
- Breadboard · jumper wiring
| Parameter | Value |
|---|---|
| Pressure sensor | MPX5050 (NXP datasheet) |
| Sensor pressure range | 0–50 kPa (datasheet value) |
| Sensor output voltage | 0.2–4.7 V (datasheet value) |
| Sensor sensitivity | 90 mV/kPa (typical, datasheet value) |
| Sensor supply voltage | 5.0 V DC (datasheet value, 4.75–5.25 V DC range) |
| Sensor accuracy | ±2.5% of full-scale span (datasheet value) |
| Sensor maximum pressure | 200 kPa (datasheet value) |
| Controller | Arduino Uno, ATmega328P, 16 MHz clock |
| ADC resolution | 10-bit (0–1023 counts) |
| Cuff inflation peak | Approximately 160 mmHg (design target) |
| Cuff deflation rate | Approximately 3 mmHg per second (design target) |
| Measurement time | Approximately 45–60 seconds per reading (expected) |
| Display | 16x2 character LCD |
| Filter cut-off | Approximately 10 Hz (design target, first-order RC low-pass) |
| Power supply | 12 V DC adapter, 1 A (expected) |
| Pump and valve drive | 6 V DC mini pump, 12 V DC solenoid valve (expected) |
Project features
The monitor's strongest capabilities are its complete oscillometric measurement cycle, its direct use of the MPX5050 sensor's analogue output, its controlled cuff deflation, and its clear LCD readout of systolic pressure, diastolic pressure and pulse rate. The pump inflates the cuff automatically and the solenoid valve releases air at a steady, chosen rate while the Arduino samples pressure continuously. The firmware filters the sensor signal, tracks the oscillation envelope as pressure falls, and converts the envelope's shape into the three displayed readings. A single push-button starts the whole cycle, status LEDs and a buzzer mark each stage, and the build stays deliberately transparent: every stage from pneumatics to display can be probed, explained and demonstrated in a viva, which is what makes it a strong teaching prototype. The display, the buzzer and the LEDs keep the measurement state visible at every moment.
- [Oscillometric measurement] The cuff is inflated above the expected systolic pressure, then deflated slowly while the Arduino records the heartbeat-driven pressure oscillations and estimates systolic and diastolic pressure from the oscillation envelope.
- [MPX5050 pressure sensing] The NXP MPX5050 sensor measures cuff pressure over a 0–50 kPa range (datasheet value) and outputs 0.2–4.7 V (datasheet value) at a sensitivity of 90 mV/kPa (typical, datasheet value), read directly by the Arduino's 10-bit ADC.
- [Controlled inflation and deflation] A mini air pump inflates the cuff and a solenoid valve releases air at a steady rate; builder note: the deflation rate was set to approximately 3 mmHg per second after bench trials showed faster deflation smeared the oscillation envelope, while slower deflation stretched each reading past 60 seconds.
- [Live LCD readout] A 16x2 LCD shows systolic pressure, diastolic pressure and pulse rate in mmHg and beats per minute, plus live cuff pressure and status messages during inflation, measurement and release.
- [Signal conditioning and filtering] Builder note: the sensor output passes through a first-order RC low-pass filter with a design-target cut-off of approximately 10 Hz before the ADC, because raw cuff-pressure samples carried pump vibration; the firmware then averages samples and tracks the pressure baseline.
- [One-button measurement cycle] A single push-button starts inflation, measurement and release automatically, and the display reports a leak or a loose cuff instead of a reading when the pressure trace does not behave as expected.
- [Status LEDs and buzzer] LEDs mark inflation, measurement and completion, and a buzzer sounds once when the result is ready, so the measurement state is obvious without watching the display.
- [Optional add-on: Bluetooth logging — not in the base build] An HC-05 Bluetooth module can be added on request to send readings to a phone app; it is an optional customization and is not part of the base prototype.
What is included
- Working blood pressure monitor prototype (cuff, pump, valve, MPX5050 sensor board, Arduino Uno, LCD)
- Complete Arduino firmware with oscillometric envelope detection
- Circuit diagram and wiring documentation
- Component list with part numbers and expected costs
- Signal-conditioning and calibration procedure document
- Project report PDF (background, oscillometric theory, methodology, results)
- PPT presentation for final review
- Viva Q&A preparation document (oscillometry, MPX5050 transfer function, filtering, calibration)
Limitations & prerequisites
- This project is an academic prototype and is not intended to replace certified medical equipment, professional diagnosis or clinical decision-making.
- No clinical accuracy is claimed: readings are estimates from an oscillometric envelope algorithm and have not been validated against a certified monitor in a clinical trial.
- Readings depend on correct cuff size and snug fitting; a loose cuff or a cuff over thick clothing produces unreliable results.
- Arm movement, talking or a shaky table during the approximately 45–60 second measurement corrupts the oscillation envelope and can force a repeat reading.
- The envelope-ratio method assumes a regular heartbeat; irregular rhythms are not handled and can produce misleading estimates.
- The prototype is calibrated on the bench against a reference gauge, not against a certified medical device, so the report must present its figures as bench-checked estimates.
- The pump and valve are audible during inflation and deflation, and the unit needs mains power through a 12 V DC adapter (expected) — there is no battery backup in the base build.
Frequently Asked Questions
How does the oscillometric method work in this project?
The cuff is inflated above systolic pressure, then deflated slowly while the MPX5050 sensor watches cuff pressure and the Arduino records how each heartbeat's oscillation grows and then shrinks as pressure falls. The amplitude envelope peaks near the mean arterial pressure, and systolic and diastolic pressures are estimated from fixed fractions of that peak on the envelope's rising and falling sides.
Which sensor and controller are used, and why?
The MPX5050 pressure sensor is used because its 0–50 kPa range (datasheet value) covers cuff pressures and its 0.2–4.7 V analogue output (datasheet value) connects directly to an Arduino ADC pin without extra amplification. The Arduino Uno is used because its 10-bit ADC, 16 MHz clock and simple analogue input are enough to sample the pressure signal, run the filtering and envelope detection, and drive the LCD, pump and valve.
How accurate are the readings?
The readings are bench-checked estimates from an academic prototype, not clinically validated measurements, and no clinical accuracy is claimed for them. The MPX5050 itself is specified at ±2.5% of full-scale span (datasheet value), but the final reading also depends on cuff fit, arm movement and the envelope-ratio algorithm. This project is an academic prototype and is not intended to replace certified medical equipment, professional diagnosis or clinical decision-making.
What power supply does the monitor need?
A 12 V DC adapter rated at 1 A (expected) powers the whole unit: the Arduino runs from its regulated 5 V DC rail, the mini pump runs at 6 V DC, and the solenoid valve runs at 12 V DC through a transistor driver. The MPX5050 sensor itself takes 5.0 V DC (datasheet value), and there is no battery backup in the base build, so the unit must stay plugged in during a measurement.
Can the readings be sent to a phone or stored?
Not in the base build — the results appear only on the 16x2 LCD and are not stored after the unit is switched off, so each reading must be noted down by hand. An HC-05 Bluetooth module can be added as an optional customization to send systolic pressure, diastolic pressure and pulse rate to a phone app, and an SD-card logging option can be added the same way. Both are quoted separately and are not part of the base prototype.
Is this project suitable for a final-year project?
Yes — for Electronics & Telecommunication, Electrical and Biomedical-related programs, because it combines pressure sensing, analogue signal conditioning, embedded firmware and pneumatic control around a real biomedical measurement method. The oscillometric algorithm gives the viva a genuine technical discussion, and the report documents the method, the calibration procedure and the prototype's limits honestly.
Components & software requirements
- Arduino Uno (ATmega328P)
- MPX5050 pressure sensor
- Mini air pump · solenoid valve
- Arm cuff · silicone tubing
- 16x2 LCD display
- RC low-pass filter · signal conditioning
- Arduino IDE · Embedded C
- Breadboard · jumper wiring
Delivery information
Built-to-order project. Delivery timeline is shared after order confirmation based on current queue.
Support terms
Complete documentation, setup guide, and viva preparation included. Support for setup and explanation provided.
Download free synopsis (PDF)
Enter your name and WhatsApp number — the synopsis PDF downloads immediately. We may send occasional project updates on WhatsApp; no spam.