
More project photos (2)
The problem
An Arduino automatic tea maker is a small brewing machine built around an Arduino Uno that heats water, holds it near a chosen temperature, steeps tea for a timed interval, and then signals that the tea is ready. It replaces standing beside a pot with sensor feedback, a relay-controlled heater stage, and a countdown timer.
The problem with manual tea brewing is that the result depends on guesswork: water that is too cool gives weak, flat tea, while water left boiling too long can turn the same leaves bitter, and steeping time is usually judged by eye rather than measured. An Arduino automatic tea maker addresses that guesswork by tying brewing to a reading and a timer instead of habit, so the maker need not watch the pot continuously. In hostels, small offices, and busy homes, tea is often made in a hurry between other tasks, so the pot is forgotten, the water cools, or the tea steeps until it becomes unpleasant to drink. Cups therefore taste different even with the same leaves and pot, and nobody can say what changed between a good cup and a poor one. A small automated brewer makes the process visible: temperature shows on a display, steeping counts down openly, and the heater switches off at the end.
How it works
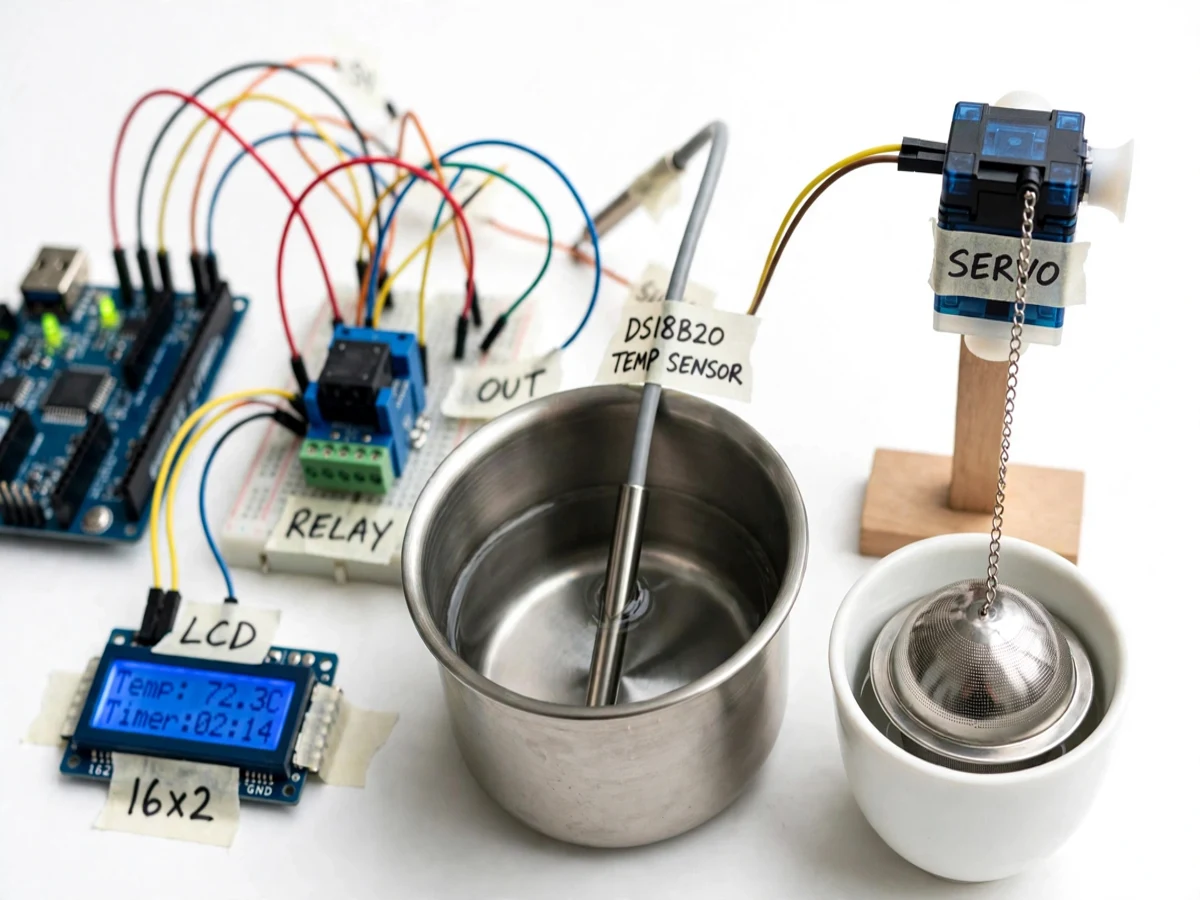
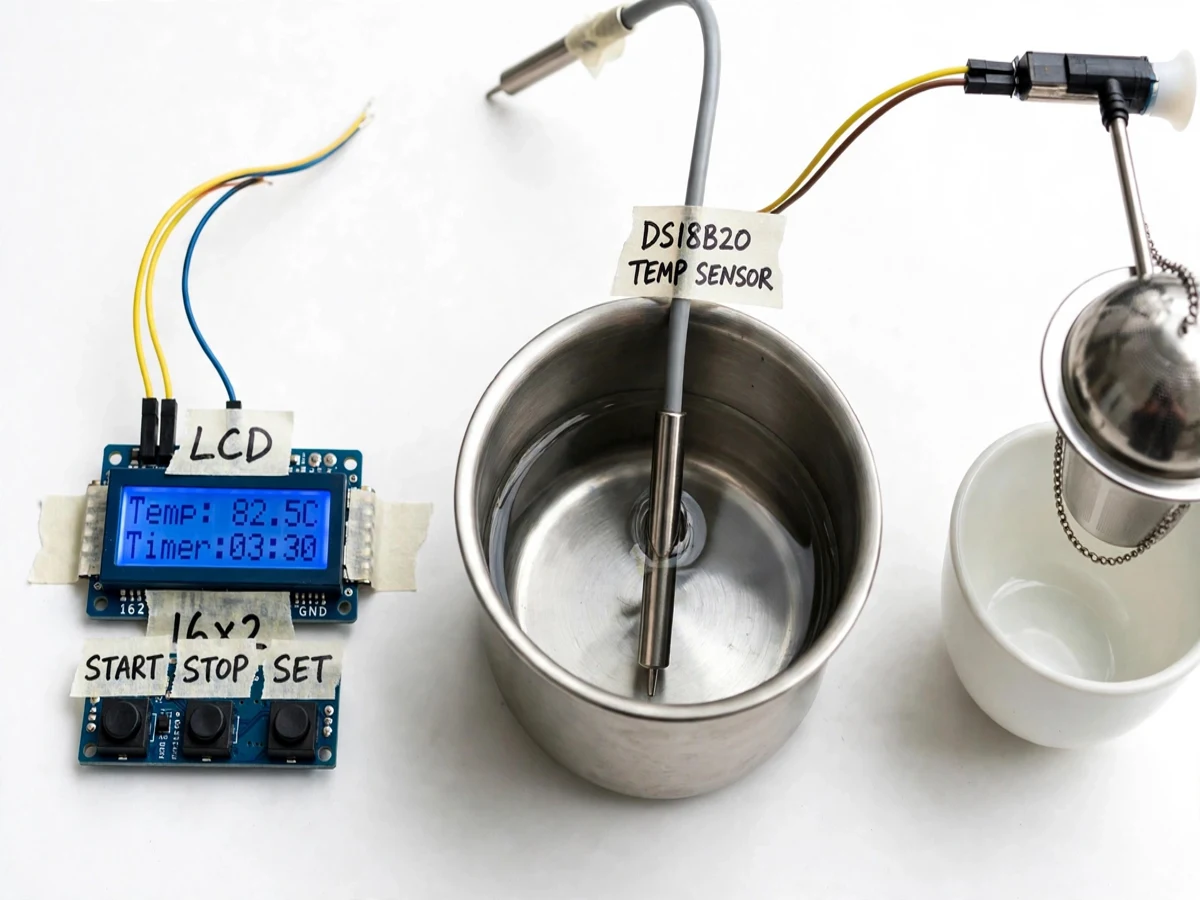
The cycle begins when the user fills the pot, places the tea infuser in its holder, and selects a brew strength with the push buttons; the Arduino then shows the set temperature and steeping time on the display. The controller switches the heater stage on through the relay and keeps sampling the waterproof temperature sensor, switching the heater off and on around the set point so the water approaches the target steadily rather than overshooting into a rolling boil. Once the water reaches the set temperature, the servo arm lowers the infuser into the hot water and the brew timer starts counting down on the display, with temperature still monitored throughout steeping. When the timer reaches zero, the buzzer sounds, the servo lifts the infuser out, and the heater stage switches off, leaving a finished cup. Milk and sugar are added by hand after brewing, exactly as with a manually brewed cup.
- The user fills the pot with water, fits the tea infuser, and selects a brew strength (mild, standard, or strong) with the push buttons.
- The Arduino reads the preset, shows the set temperature and steeping time on the LCD, and switches the heater stage on through the relay module.
- The waterproof temperature sensor samples the water continuously and the controller switches the heater on and off around the set point to hold the temperature steady.
- When the water reaches the set temperature, the servo arm lowers the steel tea infuser into the hot water and the brew timer starts.
- During steeping, the LCD shows the live temperature and the remaining brew time while the controller keeps the water near the set point.
- When the timer ends, the buzzer sounds, the servo lifts the infuser out of the water, and the heater stage switches off automatically.
- The user removes the cup, adds milk and sugar by hand if wanted, and presses stop at any point to end a cycle early.
Comparison
| Aspect | Arduino automatic tea maker | Manual stovetop brewing | Electric kettle |
|---|---|---|---|
| Temperature control | Sensor feedback holds water near a chosen set point | Judged by eye and by how the water looks | Boils water fully, with no brewing set point |
| Steeping time | Countdown timer starts when water is ready | Timed by memory or not timed at all | No steeping stage; timing is entirely manual |
| Attention needed | Set the preset and wait for the buzzer | Standing beside the pot throughout | Must watch, pour, and steep by hand |
| Repeatability | Same preset gives the same steps every time | Varies with who is brewing and how busy they are | Varies, since steeping is separate and manual |
| What it is best for | Repeatable cups with visible temperature and timing | A quick single cup when someone is free to watch | Fast boiling only, before a separate manual brew |
Tech stack:
- Arduino Uno (ATmega-based microcontroller board)
- DS18B20 waterproof temperature sensor
- Relay module for the heater control stage
- SG90 servo motor for the infuser arm
- Character LCD with push-button controls
- Buzzer for the end-of-brew alert
- Arduino IDE with a C++ control sketch
| Parameter | Value |
|---|---|
| Controller | Arduino Uno board |
| Temperature sensor | DS18B20 waterproof probe, range -55 °C to +125 °C (datasheet value) |
| Temperature display | Live reading on a character LCD in °C |
| Brew temperature | 85 °C to 95 °C (design target) for black tea presets |
| Brew timer | 3 minutes to 5 minutes (design target), depending on preset |
| Serving size | 150 ml to 200 ml per cup (design target) |
| Heater control | Relay-switched heater stage, control side at 5 V DC (datasheet value) |
| Heater supply | 230 V AC mains through an isolated relay stage (design target) |
| Safety cutoff | Heater switches off at 100 °C (design target safety cutoff) |
| Infuser drive | SG90 servo arm lowering and lifting a steel tea infuser |
| User controls | Push buttons for preset, start, and stop |
| End-of-brew signal | Buzzer alert when the timer reaches zero |
Project features
Temperature control, a timed brew cycle, and a moving infuser are the three capabilities that define this build, and the display ties them together. The temperature sensor watches the water continuously, so the heater stage switches on and off around the chosen set point instead of running blindly until someone notices. The brew timer starts only once the water is ready, so steeping time is measured from the right moment rather than from when the switch was flipped. The servo-driven infuser lowers the tea leaves into the hot water and lifts them out when the timer ends, which keeps the strength consistent from one cup to the next. A character LCD shows the live temperature and the remaining brew time throughout the cycle, so the whole process can be followed at a glance and demonstrated clearly.
- [Temperature-controlled heating] A waterproof temperature sensor reads the water continuously and the Arduino switches the heater stage through a relay, holding the water near the chosen set point instead of boiling it unchecked.
- [Timed brew cycle] The brew timer starts when the water reaches the set temperature, counts down on the display, and ends the cycle with a buzzer alert so steeping never depends on guesswork.
- [Servo-driven tea infuser] A servo arm lowers a steel tea infuser into the hot water at the start of steeping and lifts it out when the timer ends, giving a consistent steep for every cup.
- [Live LCD readout] A character LCD shows the current water temperature and the remaining brew time at all times, so the brewing state is visible without opening the pot or lifting the infuser.
- [Preset brew strengths] Mild, standard, and strong presets change the set temperature and steeping time together, so a user picks a taste preference with push buttons instead of tuning values by hand.
- [Automatic heater switch-off] The heater stage switches off at the end of the cycle and at a safety cutoff temperature, so the build does not keep heating after the tea is ready.
- [Manual stop and override] A stop button ends the cycle immediately at any point, lifts the infuser, and switches the heater off, giving the user full control over an automated cycle.
What is included
- Fully assembled Arduino automatic tea maker prototype (controller, sensor, relay stage, servo infuser, display, and pot)
- Arduino control sketch with temperature control, brew timer, presets, and safety cutoff logic
- Circuit diagram and wiring guide for the sensor, relay, servo, display, and buttons
- Builder note on sensor wiring (see Limitations): the sensor lead is routed away from relay output wiring, with a short settling pause before each reading
- Project report PDF (background, circuit explanation, brewing logic, testing notes, and limitations)
- PPT presentation for final review
- Viva Q&A preparation document (temperature sensing, relay switching, servo control, and timer logic)
Limitations & prerequisites
- The heater safety cutoffs are design targets, not certified safety devices: the build controls a low-voltage relay stage, and mains wiring must be insulated, enclosed, and checked by someone competent before use.
- Never leave the brewer running unattended: it is a student prototype for supervised demonstration, not a certified kitchen appliance, and the pot must never be allowed to boil dry.
- Milk and sugar are added by hand after brewing; the build automates heating, steeping, and timing only, and does not dispense milk or sugar.
- Taste still depends on the tea leaves and water used: the same preset can taste different with different leaf grades, and no flavour result is claimed or measured.
- The temperature sensor must sit fully in the water to read correctly; a partly exposed probe reads air temperature and gives a misleading display.
- Builder note from the actual build: during bench testing, the first wiring layout ran the temperature sensor lead beside the relay output wiring, and the displayed reading jumped whenever the relay switched. Moving the sensor lead away from the relay wiring and adding a short settling pause before each reading steadied the display, and the delivered wiring follows that corrected layout.
- The first-principles mechanism behind the design is simple and quotable: tea strength grows with water temperature and steeping time, so controlling those two variables, and removing the leaves when the timer ends, is what makes one cup repeatable after another.
Frequently Asked Questions
How does the Arduino automatic tea maker work?
The Arduino reads the water temperature from a waterproof sensor, switches a heater stage on and off through a relay to hold the water near a chosen set point, and then lowers a servo-driven tea infuser into the water for a timed steep. When the timer ends, the buzzer sounds, the infuser lifts out, and the heater switches off, so the whole cycle runs from one preset selection.
In practice, the user only fills the pot, fits the infuser, and picks a brew strength; the controller handles heating, timing, and switch-off, and the LCD shows temperature and remaining time throughout.
What temperature and steeping time does it use for tea?
The black tea presets use a brew temperature of 85 °C to 95 °C (design target) and a steeping time of 3 minutes to 5 minutes (design target), with the milder preset at the lower end and the stronger preset at the higher end. The timer starts only when the water reaches the set temperature, so the steep is measured from the right moment.
These figures are design targets chosen for the build, not laboratory measurements of flavour, and they can be changed in the sketch for a different tea type or taste preference.
Is it safe to use a relay-switched heater at home?
It is safe only with proper mains precautions: the Arduino side runs at low voltage, while the heater side uses mains supply switched through an isolated relay stage, so all mains wiring must be insulated, enclosed, and checked by someone competent. The build must never be left running unattended, and its safety cutoffs are design targets, not certified protection.
Treat it as a supervised student prototype for demonstration, not as a certified kitchen appliance, and never let the pot boil dry.
Can it make milk tea or add sugar automatically?
No, this build brews plain tea only: it heats water, steeps tea leaves for a timed interval, and signals when the tea is ready, while milk and sugar are added by hand afterwards. Automating milk and sugar would need sealed dispensers, food-safe handling, and cleaning arrangements that are outside this build's scope.
That boundary keeps the prototype simple, hygienic, and explainable, and it is stated plainly so the scope is never oversold.
Is this project suitable for a final-year project?
Yes, for Electronics, Electrical, and Embedded Systems programs, because it combines sensor interfacing, relay-based power control, servo actuation, timer logic, and a working hardware demonstration in one build. The temperature feedback loop and the preset system give clear material for a report, a demonstration, and viva discussion.
It also demonstrates honest engineering limits: mains safety, sensor placement, and the boundary between a prototype and a certified appliance are all part of the documented design.
Components & software requirements
- Arduino Uno (ATmega-based microcontroller board)
- DS18B20 waterproof temperature sensor
- Relay module for the heater control stage
- SG90 servo motor for the infuser arm
- Character LCD with push-button controls
- Buzzer for the end-of-brew alert
- Arduino IDE with a C++ control sketch
Delivery information
Built-to-order project. Delivery timeline is shared after order confirmation based on current queue.
Support terms
Complete documentation, setup guide, and viva preparation included. Support for setup and explanation provided.
Download free synopsis (PDF)
Enter your name and WhatsApp number — the synopsis PDF downloads immediately. We may send occasional project updates on WhatsApp; no spam.