
More project photos (2)
The problem
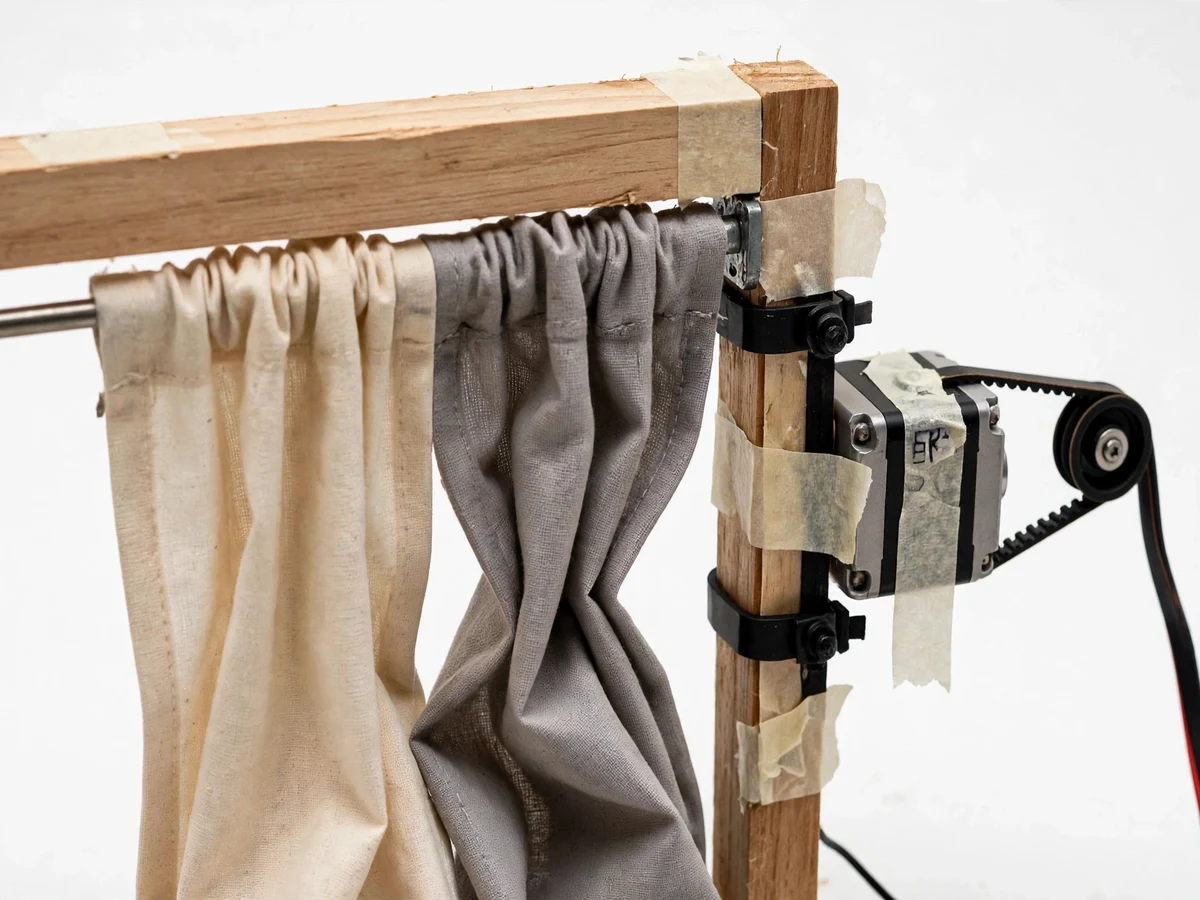
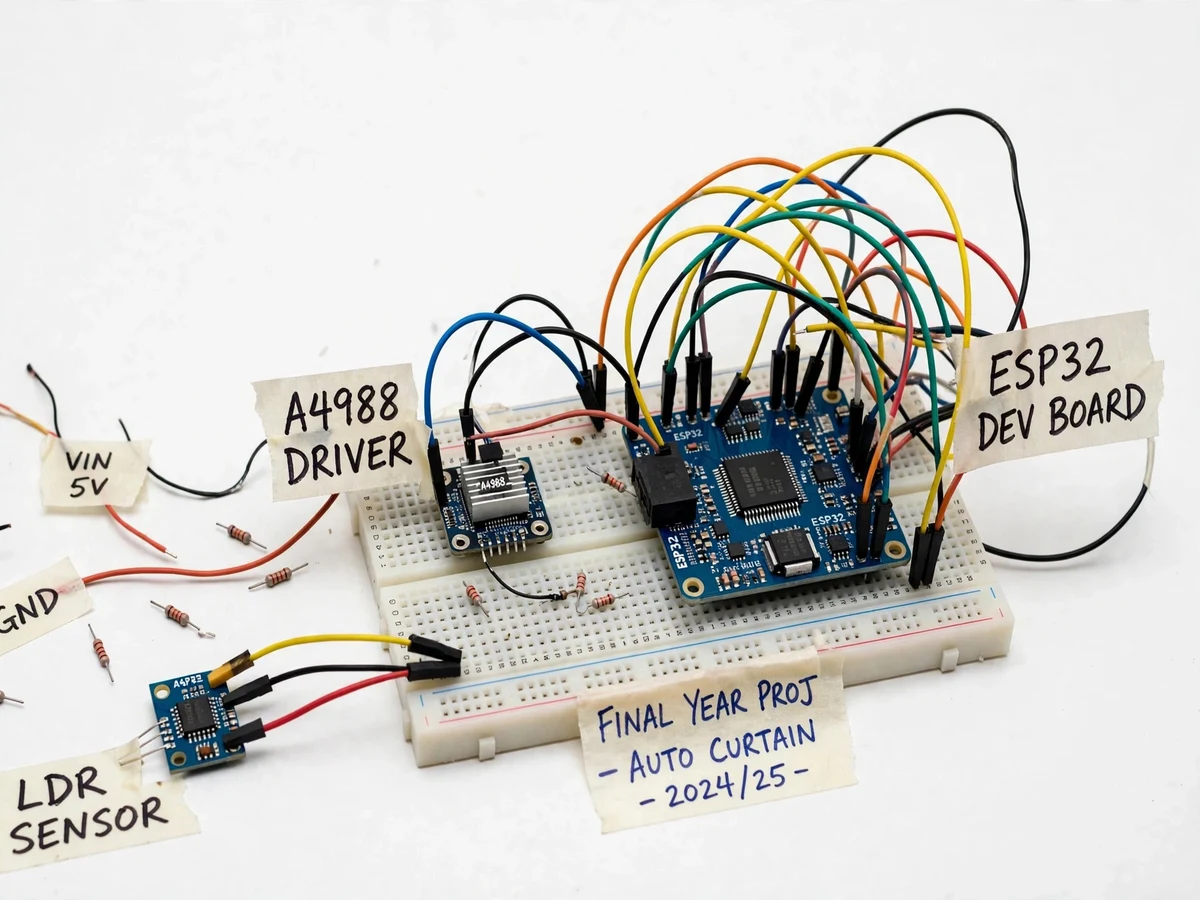
Curtains left closed all day waste free daylight, and remembering to open and close them on schedule is the kind of chore automation exists for. A light sensor knows dawn and dusk better than any clock, and a stepper motor can position curtains precisely — the engineering work is in the light threshold with hysteresis, the belt drive mechanics and the manual override. This project builds a student-scale automatic curtain opener on an ESP32: an LDR module tracks ambient light, and when it crosses the configured day/night thresholds the stepper motor drives the curtain carrier along the rail via a belt and pulley. The LCD shows light level and curtain state, and manual buttons open or close the curtains regardless of the sensor.
How it works
- The LDR module continuously reports ambient light level to the ESP32, shown live on the LCD.
- When the reading rises above the day threshold, the ESP32 drives the stepper motor through its driver, and the belt pulls the curtain carrier to the open end of the rail.
- When the reading falls below the night threshold, the motor runs in reverse and the curtains close.
- Hysteresis between the two thresholds means a passing cloud cannot trigger repeated open-close cycles.
- Pressing the manual open or close button moves the curtains immediately and suspends automatic moves until the next threshold crossing.
- The firmware ramps stepper speed at the start and end of each move for smooth, quiet motion.
Tech stack:
- ESP32 development board
- LDR light sensor module
- Stepper motor with driver (ULN2003/A4988 class)
- Belt and pulley rail drive
- 16x2 character LCD
- Push buttons
- Arduino IDE (C/C++ firmware)
| Parameter | Value |
|---|---|
| Controller | ESP32 development board |
| Light sensing | LDR module, potentiometer-trimmed thresholds |
| Actuator | Stepper motor, belt-and-pulley rail drive (design) |
| Travel | Full rail traverse, design approximately 30–60 s |
| Display | 16x2 character LCD (light level + state) |
| Override | Manual open/close push buttons |
| Power | Motor supply per motor rating + 5 V logic (design) |
Project features
- [Daylight-responsive operation] An LDR light sensor opens the curtains when ambient light rises past the day threshold and closes them when it falls past the night threshold.
- [Stepper motor belt drive] A stepper motor with pulley and belt moves the curtain carrier along the rail with repeatable positioning.
- [Hysteresis thresholds] Separate day and night trip points stop the curtains from hunting back and forth in marginal light like cloudy afternoons.
- [LCD status display] A 16x2 LCD shows the live light reading plus OPEN, CLOSED and MOVING states.
- [Manual override buttons] Open and close buttons take immediate control and hold the manual position until the next threshold crossing.
- [Adjustable sensitivity] A potentiometer trims the light thresholds, so dawn/dusk behaviour can be tuned and demonstrated.
- [Smooth motion control] Firmware ramps the stepper speed up and down so the curtains glide instead of jerking.
What is included
- Working model window with curtain rail, belt drive, stepper motor, ESP32, LDR sensor and LCD
- Complete firmware with commented light-threshold and stepper-control logic
- Wiring diagram and connection table
- Threshold and hysteresis tuning procedure
- Project report PDF (background, system design, firmware logic, test observations)
- PPT presentation for final review
- Viva Q&A preparation document (LDR sensing, stepper motors, hysteresis, ESP32)
Limitations & prerequisites
- The prototype uses a lightweight model curtain and rail — real curtains need a stronger motor and a full mechanical redesign.
- LDR readings depend on sensor placement and room lighting; thresholds are tuned by the buyer with the included procedure.
- The system reacts to ambient light only — it has no clock, so scheduled times are listed as future scope (RTC addition).
- Travel time and positioning repeatability are design targets verified on the buyer's own build, not certified figures.
- Heavy or blackout curtains exceed the demo motor's torque; the demo uses light fabric.
- No Wi-Fi remote control is included — operation is fully on-device.
Frequently Asked Questions
How does it know when to open or close?
The LDR measures ambient light. Above the day threshold the curtains open; below the night threshold they close. Separate thresholds with hysteresis prevent flickering between states on cloudy days.
What stops it from opening and closing repeatedly?
Hysteresis — the day and night trip points are set apart, so light has to change decisively before the state flips. The report explains this with a diagram.
Can I control the curtains myself?
Yes — the manual buttons override the automation instantly and hold the manual position until the next threshold crossing.
Can it open the curtains at a fixed time instead?
Not as built — it follows light, not a clock. Adding an RTC module for scheduled operation is listed as future scope.
Will it work with heavy curtains?
The demo is sized for a light model curtain. Real curtains would need a higher-torque motor and rail redesign, noted in the limitations.
Is this project suitable for a final-year project?
Yes — for Electronics and IoT & Embedded programs. It covers analog light sensing, stepper motor driving, hysteresis logic and a complete automation build. Suitable for B.E./B.Tech final-year projects in Electronics and IoT & Embedded.
Components & software requirements
- ESP32 development board
- LDR light sensor module
- Stepper motor with driver (ULN2003/A4988 class)
- Belt and pulley rail drive
- 16x2 character LCD
- Push buttons
- Arduino IDE (C/C++ firmware)
Delivery information
Built-to-order project. Delivery timeline is shared after order confirmation based on current queue.
Support terms
Complete documentation, setup guide, and viva preparation included. Support for setup and explanation provided.